WATCH A SHORT VIDEO OF THE NEW FEATURES
The March 2017 release of Xirrus Management System – Cloud (XMS-Cloud) is now available. This release includes scheduling and emailing reports, enhanced AP-level details to simplify troubleshooting, and an easy 2-step process to enable content filtering on the Wi-Fi network.
Email Reports with Data Stored Up To 1 Year
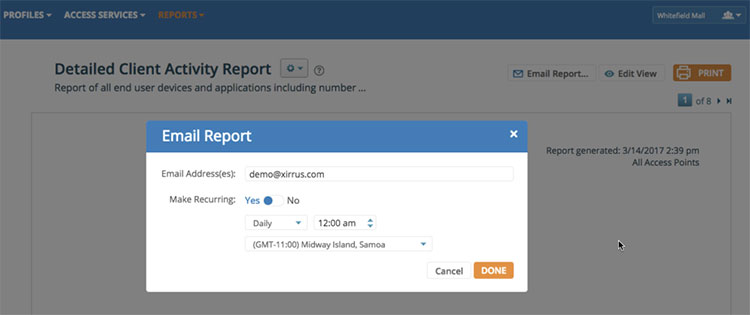
You can now automate the generation and delivery of XMS-Cloud reports to easily gain insights into your Wi-Fi network usage and trends. Reports are customizable to provide information by specified start and end times over the last 12 months, then emailed instantly or scheduled to be sent on a periodic basis.
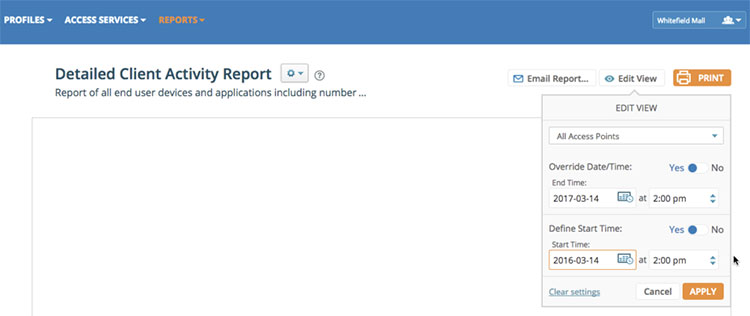
From the Reports top level menu, create a custom report or choose a standard report. Select Edit View from the top right corner to set the start and end times of the report. Click on the Email Report to set up the recipients to receive reports and the frequency of the emails.
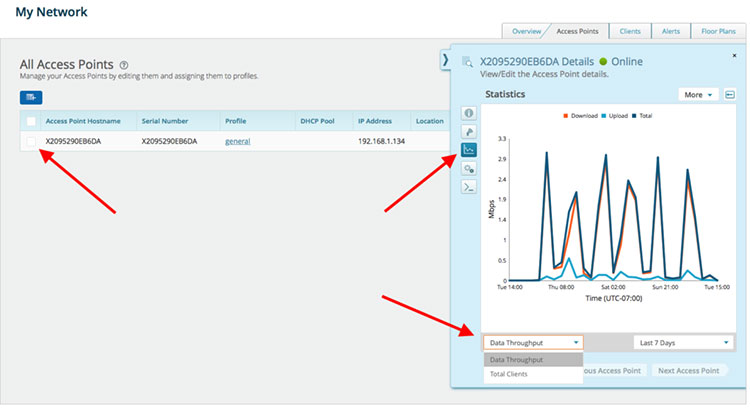
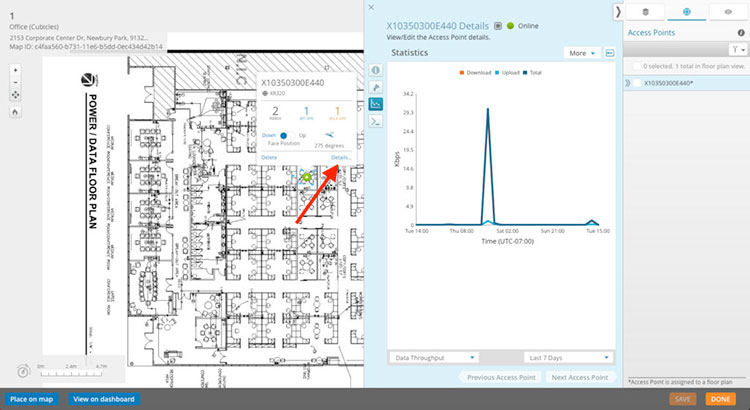
New statistical charts are available showing throughput and number of clients connected to specific APs over time. These charts can be accessed for a specific AP from the Access Points tab or from Floor Maps.
From the Access Points tab within My Network, select any AP and choose the magnifying lens to get the AP details tab. Select the new icon to access the statistical charts. Use the drop-down boxes at the bottom to select the data and time interval.
The same charts can be accessed from the Floor Plans tab within My Network. Click on a specific AP on the floor map and select Details to access the statistical charts.
Enable Content Filtering from the Cloud
Content/URL filtering can now be enabled using any DNS based content filtering engines such as WebTitan from TitanHQ, OpenDNS and others. Xirrus has partnered with TitanHQ to deliver you a simple cloud based content filtering solution which can be turned on in minutes. Even if a client device is misconfigured or maliciously configured to bypass content filtering, the AP will intercept such DNS requests and route them to the right DNS servers to enforce content filtering policies.
NOTE: This feature requires the “Technology” firmware version running on the APs. You can select this option under Settings / Firmware Upgrades.
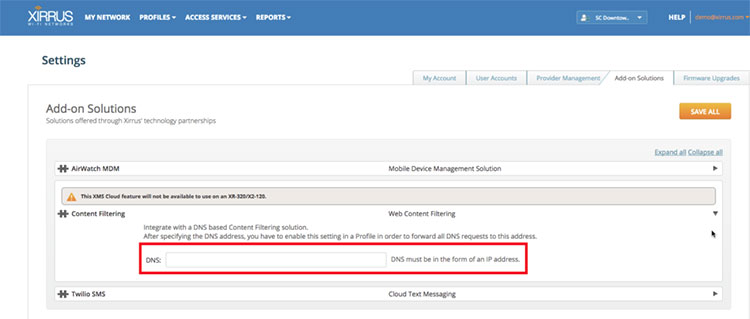
From the user name drop down menu at the top right corner of the dashboard, select Settings. Configure the IP address of the DNS server enforcing content filtering within the Add-on Solutions tab.
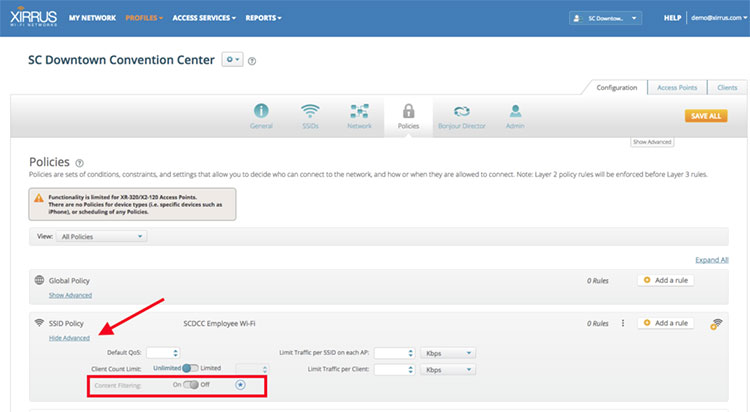
Once the content filtering DNS server IP address is configured, the filtering must be enabled on the Wi-Fi network (SSID). Select the Profile hosting the SSID from the top-level menu. Choose the Policies tab and add a new SSID policy for the specific network. From the ShowAdvanced option under SSID Policy, turn on Content Filtering.
Other Enhancements
Localized Time Display
- All time stamps on various screens, such as the Clients tab and the license Expiration Date in Access Points tab, are now displayed in local time zone selected in the General tab within a Profile.