The August 2019 release of the Xirrus Management System – Cloud (XMS-Cloud) is now available. This release contains a number of enhancements, including role-based access control for XMS admins, data quotas in EasyPass One-Click and Voucher portals, custom client hostnames, enhanced dashboard drill downs, and more..
WATCH THE VIDEO FOR A QUICK TUTORIAL OF NEW FEATURES
Role-based Access Control for XMS admins based on profiles, groups, and EasyPass portals
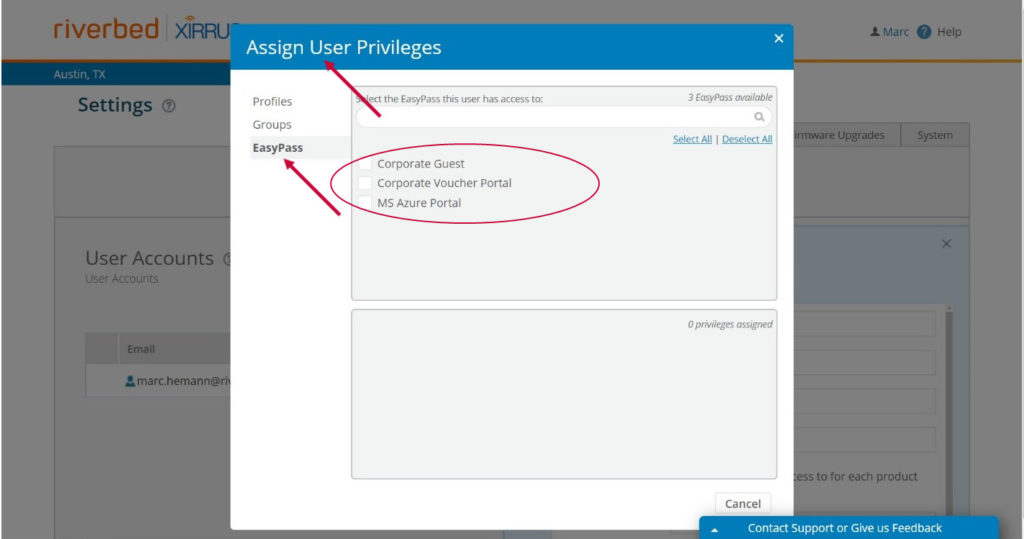
XMS-Cloud provides multiple layers of security to protect your users and data. In this release, we’ve further enhanced security by allowing you to restrict access to XMS-Cloud functionality based on admin role. You can now create user accounts based on Profiles, Groups or EasyPass portals.
To create new user accounts, click the “user icon” next to your name at the top right of the XMS-Cloud webpage, then click “Settings”. Select the “User Accounts” tab, and click the “+ NEW USER” button. In the section “Would you like to restrict this account to specific sections of your network?”, select “Yes”. Click the “Edit” button next to “0 privileges assigned”. Select either “Profiles”, “Groups”, or “EasyPass”, depending on which area of the system you want to give the user access to. Now select the specific profile, group, or EasyPass portal to further restrict the user’s access.
There are several restrictions with this new functionality. First, users with restricted privileges cannot create new profiles, groups or EasyPass portals. This must be done by the XMS Admin. Second, users with restricted privileges do not have an “All Devices” filter when customizing the Dashboard and Reports. They will only see the Profiles or Groups to which they have access.
Set data quotas in EasyPass One-Click and Voucher portals
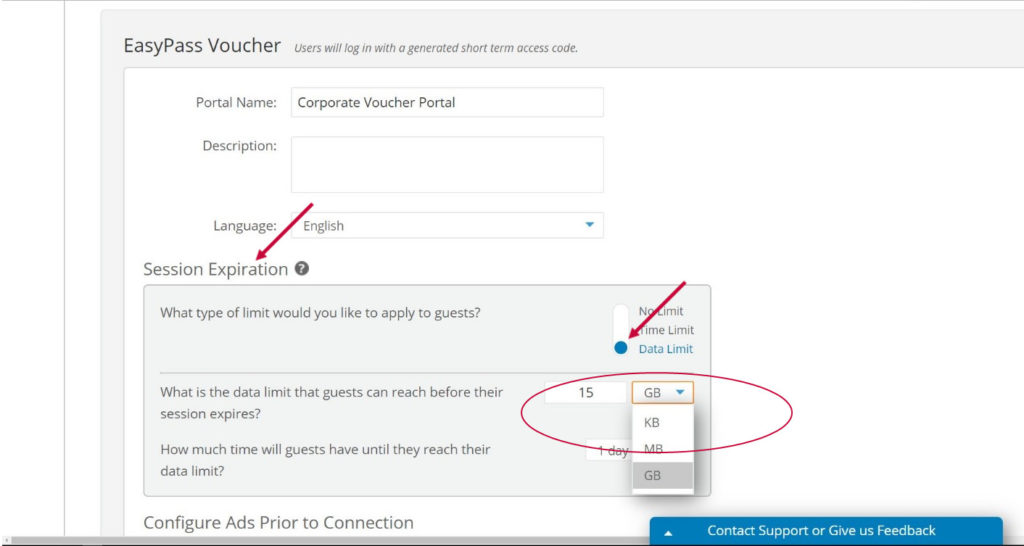
EasyPass One-click and Voucher portals now allow you to set limits on how much data a guest can consume in a specified period of time. You can set customizable limits in KB, MB, or GB depending on your needs, and you can specify how much time the guest has to reach this limit.
To set the data limit, either create a new, or open an existing, EasyPass One-Click or Voucher portal. On the “General” page, go to the Session Expiration section and set the type of limit desired to “Data Limit”. Enter the amount of data the client can use in amounts of KB, MB, or GB. Then enter the amount of time they have to use this data.
There are several restrictions with this new functionality. First, users with restricted privileges cannot create new profiles, groups or EasyPass portals. This must be done by the XMS Admin. Second, users with restricted privileges do not have an “All Devices” filter when customizing the Dashboard and Reports. They will only see the Profiles or Groups to which they have access.
Manually customize client hostnames
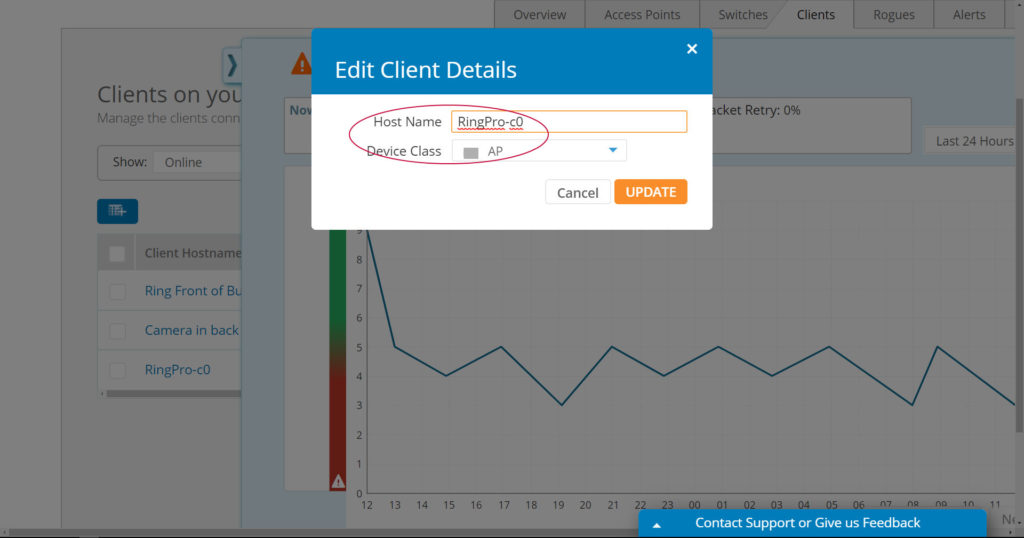
XMS-Cloud now makes it easier to track users on your Wi-Fi network. Administrators can now customize hostnames to more easily identify clients in the system.
Go to the Dashboard and click on the “Clients” tab. Hover the mouse on a specific client and select “View Device Details”. From the fly-out panel, click the “Edit” button (it looks like a blue pencil). Now you can customize the client hostname and click “UPDATE”.
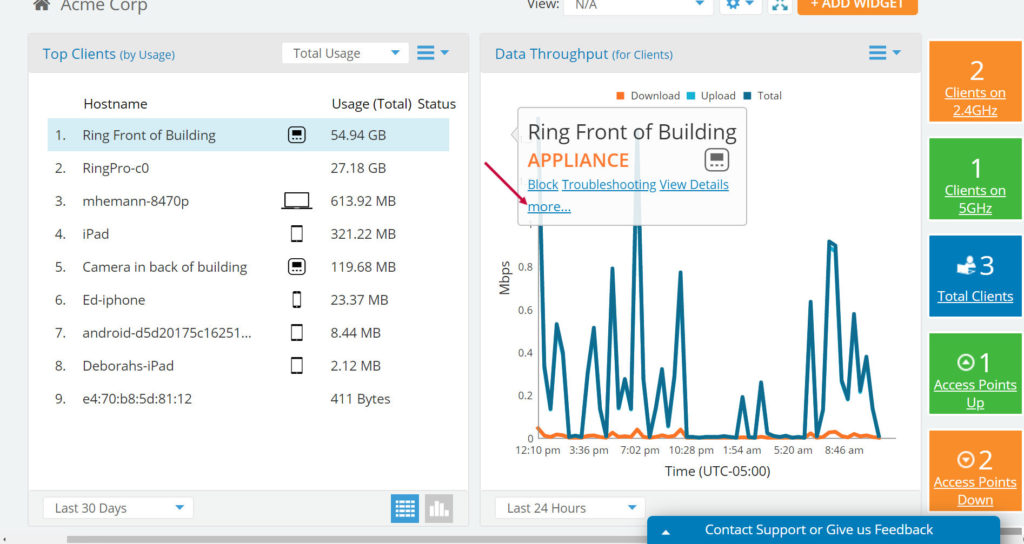
Speed Up Troubleshooting with Enhanced Dashboard Client Device Usage Drill Downs
This release adds the ability to view the percentage of bandwidth a client is using towards certain applications.
On the dashboard, go to the “Top Clients by Usage” widget. Hover the mouse on the client you wish to review, then click the “More” link. Now you see the top bandwidth-consuming applications for that client and the usage percentage breakdown.
Other Enhancements
- The Client Troubleshooting fly-out window now shows IP address trouble warnings.