The August 2020 release of Xirrus Management System – Cloud (XMS-Cloud) is now available. This release includes a number of new features related to the management of cnMatrix switches, including support for management VLANs, channel ports, and Policy Based Automation. There are also new statistics for connected wired clients. We have also added configuration flexibility for UPSK in EasyPass Onboarding, as well as heatmap functionality and station-to-station blocking for XV-series Wi-Fi 6 access points.
Support for cnMatrix EX2010, EX2028, EX2052, and EX2052R-P switches
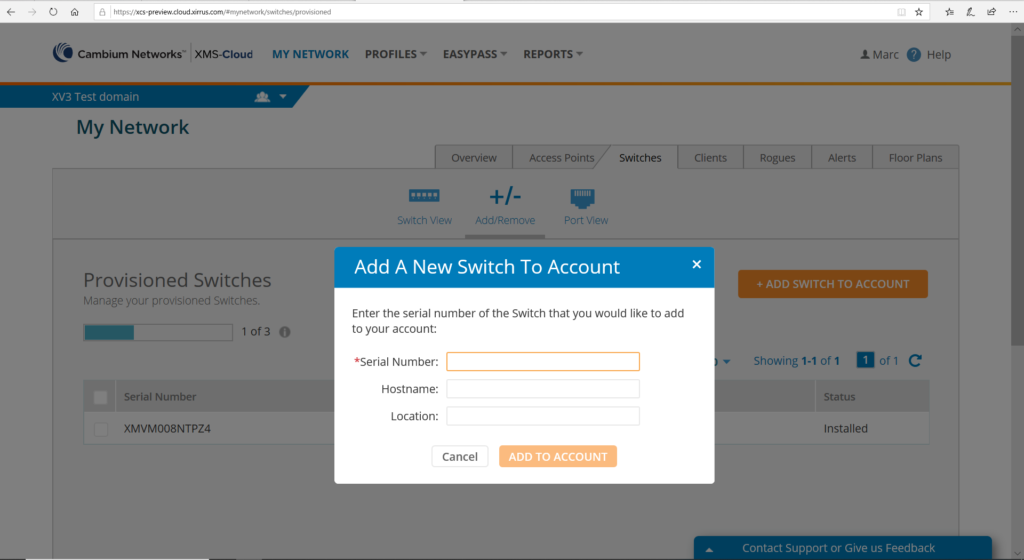
In this release of XMS-Cloud, we have added support for these four cnMatrix switch models. Adding switches to your XMS-Cloud account is very similar to the way you add APs.
Go to the MY NETWORK → Switches page and click the Add/Remove button, then insert the switch’s S/N and click “+ADD SWITCH TO ACCOUNT”.
You will be able to create Templates and Profiles to configure port settings, making it easy to configure and manage a single switch or 100’s of switches.
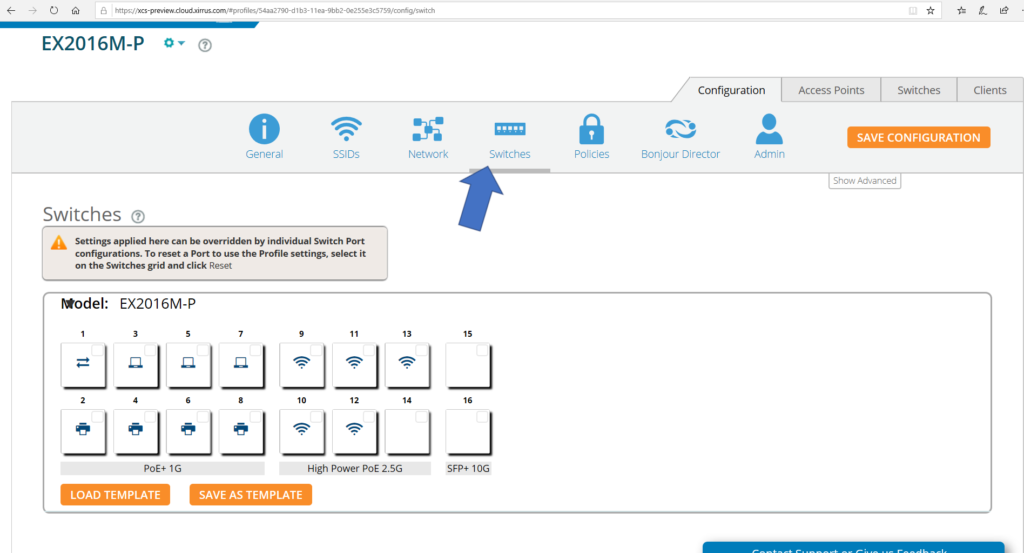
Configuration of cnMatrix VLANs and Policy Based Automation (PBA)
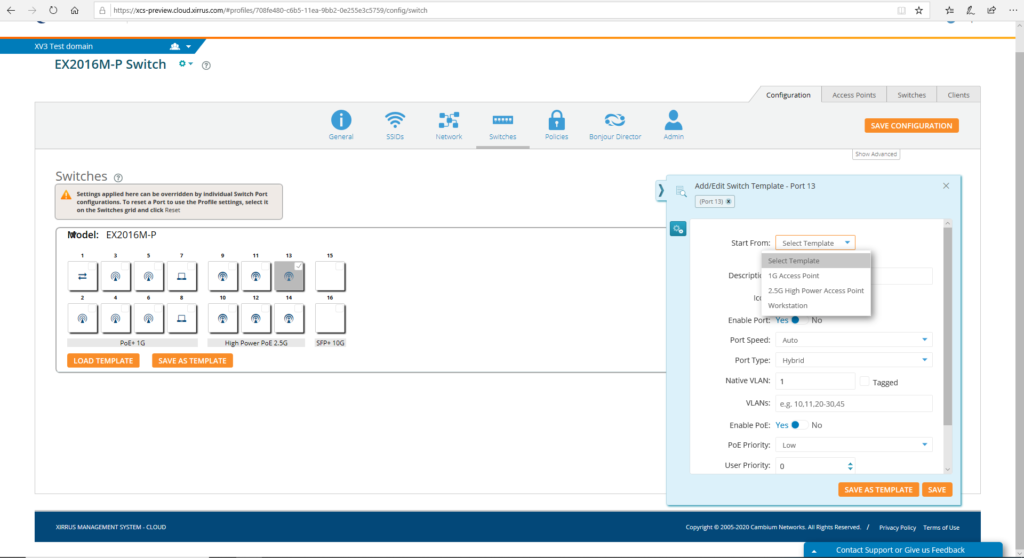
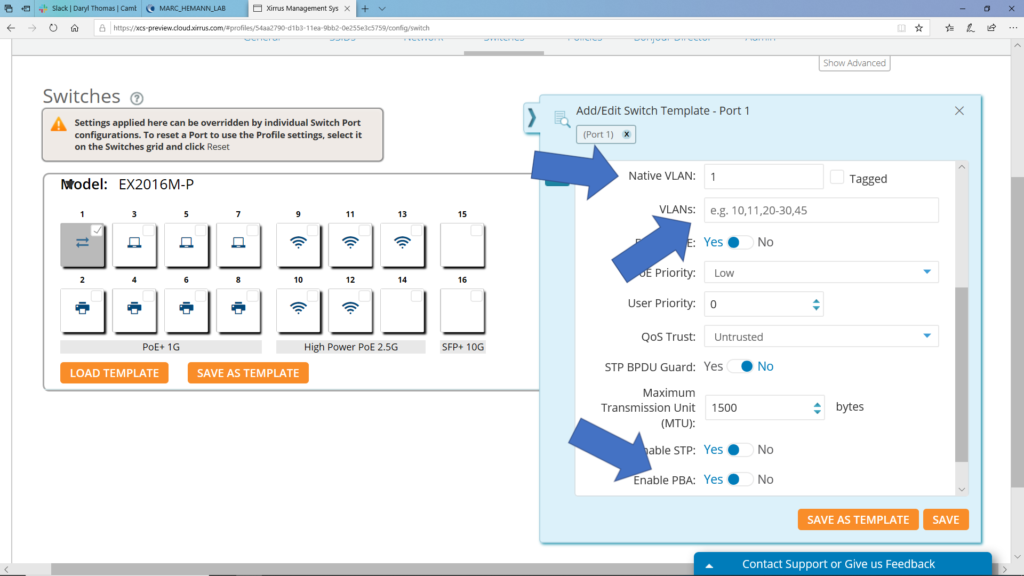
When configuring switch ports using a Profile or Template, you can configure VLANs and Policy Based Automation. To get started, first to create a Template or Profile and then click the Switches tile.
Click on any of the ports. On the fly-out window you will find the fields to configure/add the Native VLAN (Management VLAN), multiple VLANs, and enable PBA.
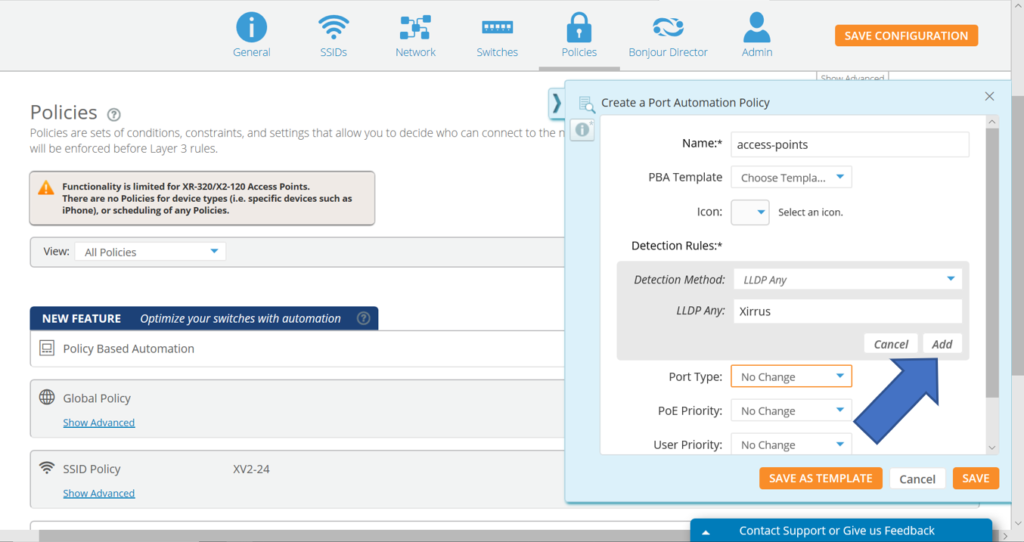
To create policies and rules for PBA, go to MY NETWORK → PROFILES and open the Profile for your cnMatrix switches. Then go to the Policies page. Under “Policy Based Automation”, click the “+” button to add a new PBA policy. On the fly-out window, give the policy a name and the click “+Add Rule”. Select the “Detection Method” you wish to use and the parameters for your selected method. Then click the “Add” button. Then finish configuring the policy with your requirements.
Creating cnMatrix port channels
To create a cnMatrix port channel to aggregate ports, go to the MY NETWORK → Switches page. Next click the model of the switch and the ports for that switch will appear. Select the two (or more) ports you want to combine. Then click the “Combine Ports” button.

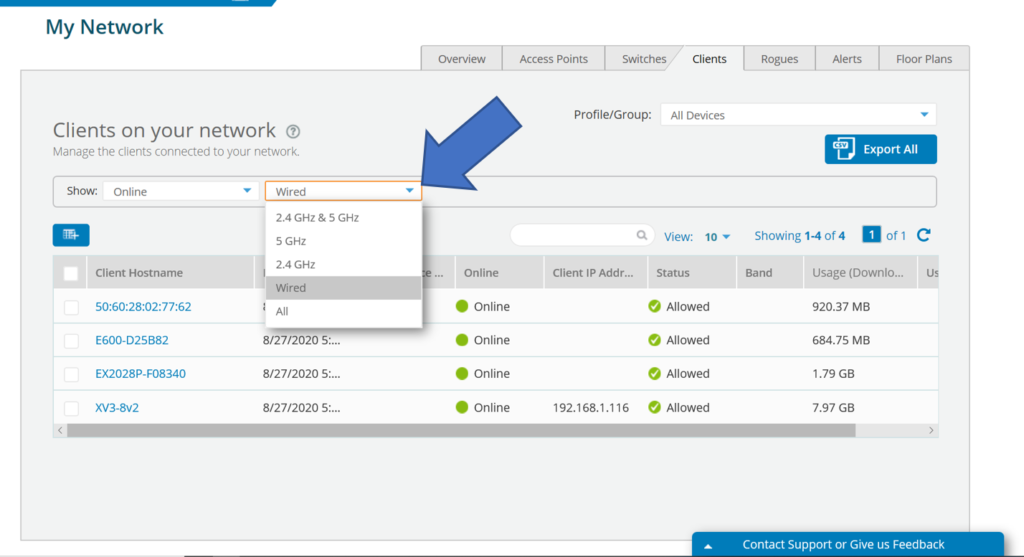
View statistics on connected cnMatrix wired clients
XMS-Cloud provides the ability to monitor usage statistics of devices that are connected to cnMatrix switch ports. All these stats can be exported for further analysis. To review the wired client stats, go to the MY NETWORK → Clients page, then click the type of client box and select “Wired”.
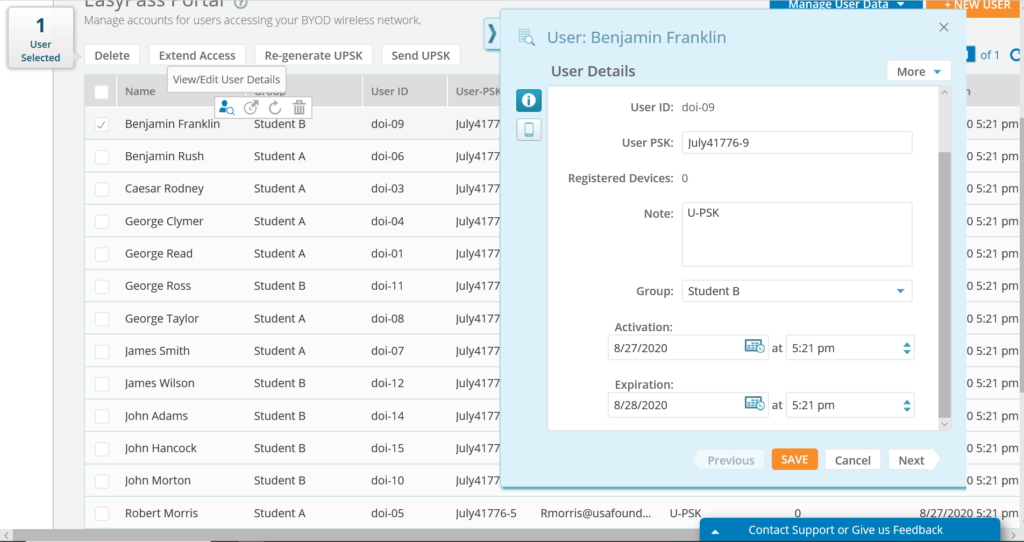
Customizing UPSKs in EasyPass Onboarding
To customize UPSKs in EasyPass Onboarding, go to EASYPASS, open your Onboarding Portal and click the “Users” tab. Select the User that you wish to modify, and click “View/Edit User Details”. On the fly-out window, you can change the User PSK, and you can also change the Activation and Expiration Date/Time.
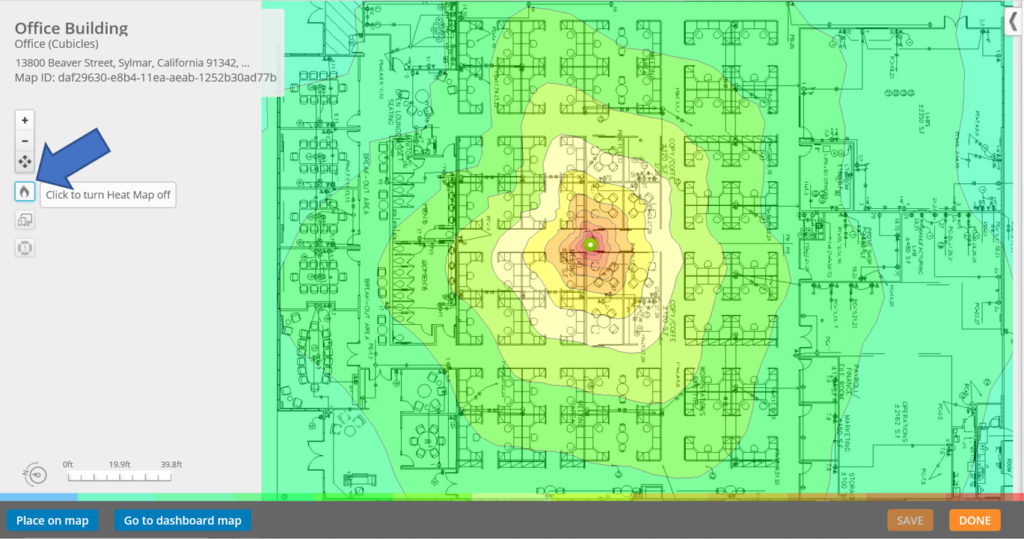
Heatmap functionality for XV-series Wi-Fi 6 APs
To see the heatmaps available for XV3-8 and XV2-2 access points, go to MY NETWORK → Floorplans. Click on the map that has your XV3-8 and/or XV2-2 access points and click the button to turn the heatmap on.
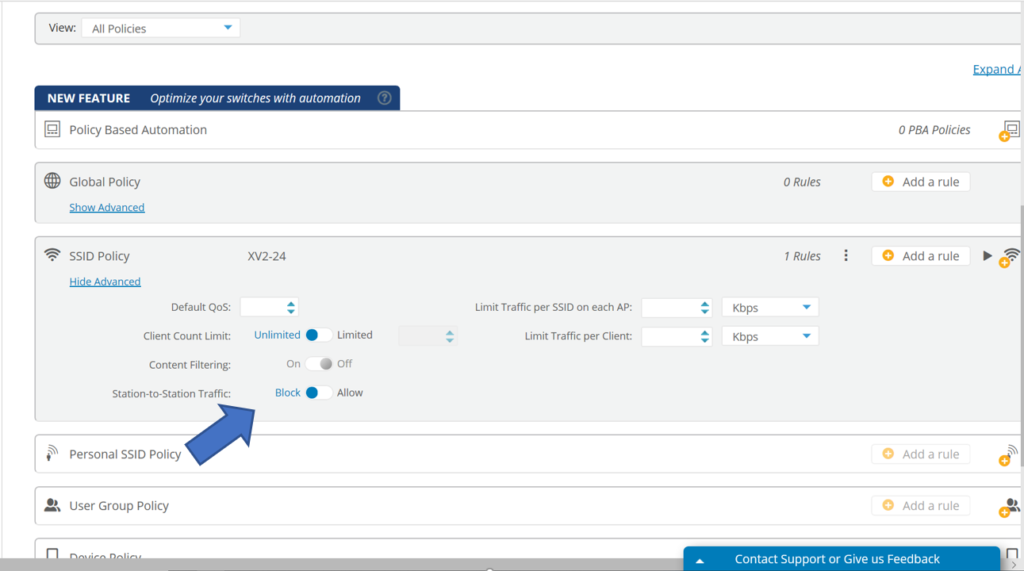
Blocking station-to-station traffic on XV-series Wi-Fi 6 APs
To block station-to-station traffic on Wi-Fi 6 access points, go to MY NETWORK → PROFILES and open the profile that you have applied to the XV3-8 and/or XV2-2 access points. Then click the Policies tile. You can set station-to-station blocking on SSID policies. If you already have an SSID policy, click the “Show Advanced” link, then for “Station-to-Station Traffic”, select “Block”. If you don’t already have an SSID Policy in place, under SSID Policy, click the “+” button and then choose the appropriate SSID. Then click the “Show Advanced” link, and then for “Station-to-Station Traffic”, select “Block”.