The October 2020 release of Xirrus Management System – Cloud (XMS-Cloud) is now available. This release includes a number of new features, including support for WPA3 authentication security on XV series Wi-Fi 6 access points, color-coded clients on floor plans based on health score, the ability to create SSID templates which can be used in different profiles, and other enhancements.

WPA3 Security for XV Series Access Points
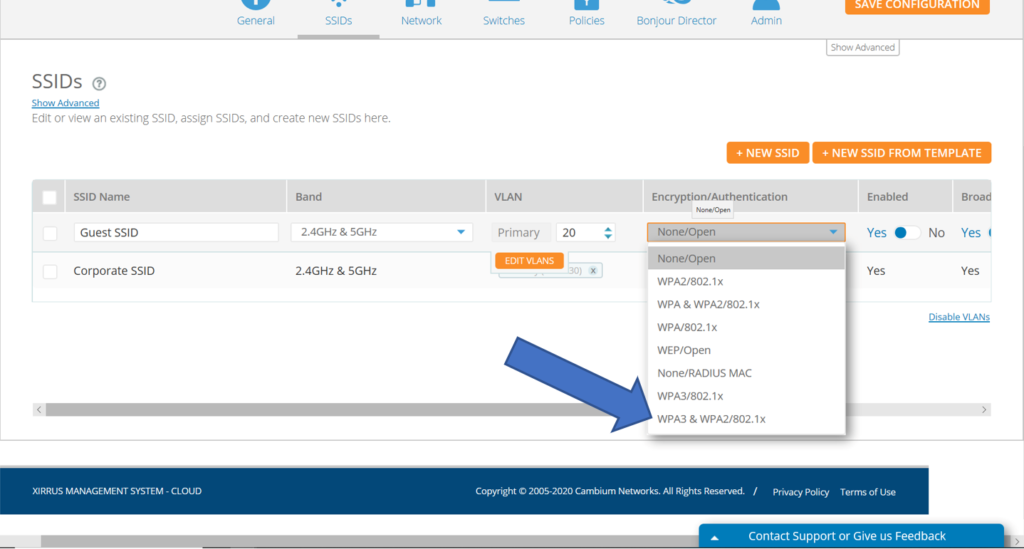
WPA3 is the latest standard in Wi-Fi security and is now supported on the XV series of Wi-Fi 6 access points. It is very easy to implement WPA3 security by selecting it as an option when you configure encryption/authentication on the SSID.
To setup WPA3, open your profile, go to the SSIDs tab, click the drop down box under encryption/authentication, and select WPA3 & WPA2/802.1x. On the authentication page, enter and confirm the pre-shared key, or password. fffff

WPA3 support is available on XV series Wi-Fi 6 access points. Any 802.11ac access points, such as the XD2 and XD4 models, will automatically use WPA2 security if they are in the same profile where WPA3 security has been enabled.
Color-Coded Client Location Based on Health Score
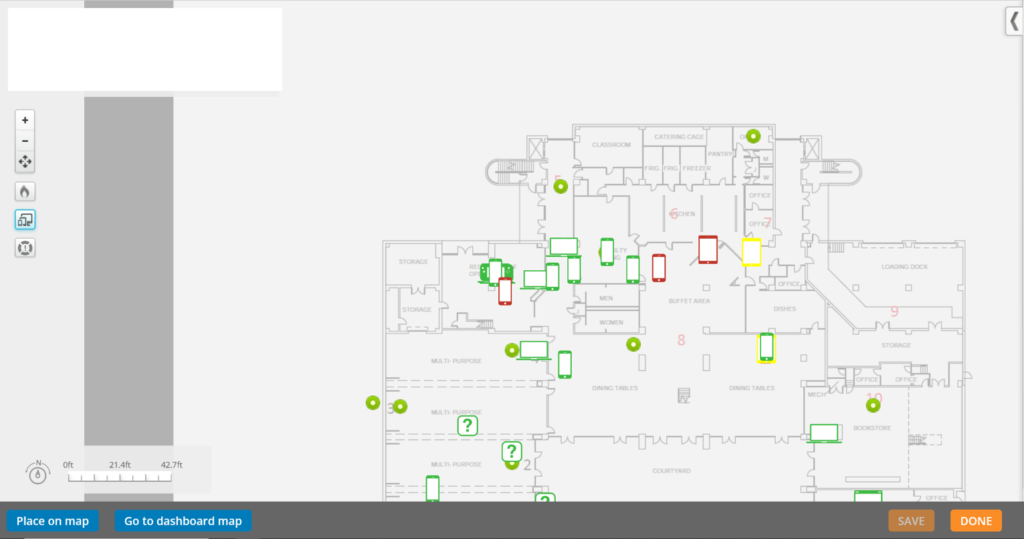
When viewing the floorplan of your network and if Location Services are enabled, you can now easily see the health of clients located in your network based on their color.

To review a client’s health status on the floorplan, go to My Network and click the Floorplans page. Click on the floorplan you wish to review. Then click the “Show Clients” button on the left side. You will see client devices appear on the map. A green colored client indicates a good health score, a yellow client indicates an ok health score and a red client indicates a bad health score. Using these color codes, you can quickly find locations or individual clients that may encountering issues. Click on a client to see what AP that client is connected to.
SSID Templates
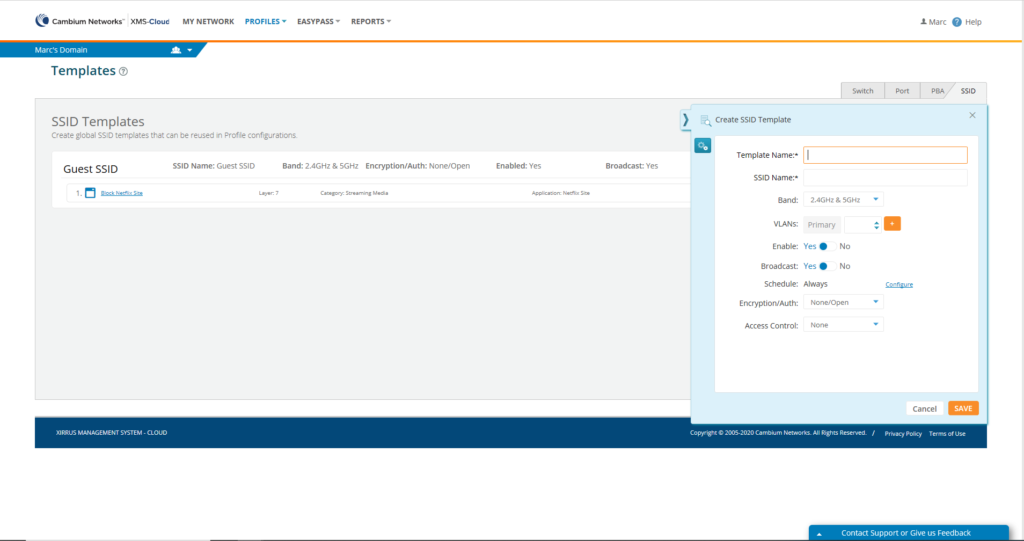
The ability to create SSID templates that can be using across multiple profiles is now available. You can create an SSID template and use it as often as necessary instead of having to re-create the SSID every time you need it in a profile. This will save you time and eliminate errors.

To create an SSID template, go to Profiles and click Templates. Now click the SSID tab and click the New Template button. Give the template a name, configure the SSID and Save. Once the SSID template has been configured, you can add firewall and application control rules. These rules will be enforced whenever this SSID template is used. After the template has been created, you can go back to edit or delete the template as needed.
To apply the template, go to the profile, click the SSIDs tile, click the NEW SSID FROM TEMPLATE button, click the dropdown and select the template you want to use. The pre-configured SSID will be added. You can make any changes to the SSID to customize it if necessary. Any changes made to the SSID will not affect the template.
Other Enhancements
- Access Point Export Includes “Out of Service” APs
- Search Alerts by Device S/N
- Update to EasyPass Onboarding Portal email