The December 2020 release of Xirrus Management System – Cloud (XMS-Cloud) is now available. This release includes a number of new features, including a streamlined look in Profiles, management support for the cnMatrix EX1000 series switches, additional management options for all cnMatrix switches, Wi-Fi 6 rogue detection and polling, and more.

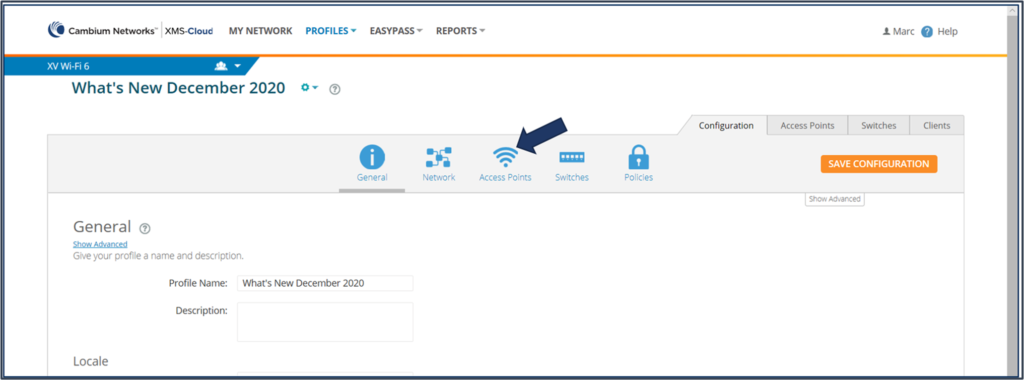
Streamlined Profiles
We have streamlined the Profiles area of the application to make it more intuitive and easier to follow. We have moved some of the minor configuration options such as SSIDs, Bonjour Director and Admin from their own top level tile to placing them under different major top level configuration tiles. The key changes are:
- Admin Password changes moves from a top level tile to the General tile.
- SSID management moves from a top level tile to the Access Points tile.
- Location Services moves from a top level tile to the Access Points → Show advanced page.
- Bonjour management moves from a top level tile to the Network tile.
Additional support for cnMatrix switches
XMS-Cloud now supports the complete cnMatrix enterprise switch line with the addition of the EX1000 series models. You can manage the EX1000 series using profiles and PBA policies.
To add a cnMatrix switch to XMS-Cloud, go to Switches → Add/Remove → Add Switch to Account. Enter the new cnMatrix switch’s serial number and click Add to Account. To manage this switch in a Profile, go to Profiles and either create a new profile or open an existing profile and click the Switches tile. You can either configure the ports individually or apply a pre-configured template. To use PBA policies, click the Policies tile, then under Policy Based Automation, click New Port Automation Policy button. Configure the policy and click Save.
New in this XMS-Cloud release is the ability to power cycle individual switch ports. Go to My Network → Switches → Switch View. Select the port you need to power cycle, click the Actions button → Power Cycle → OK.
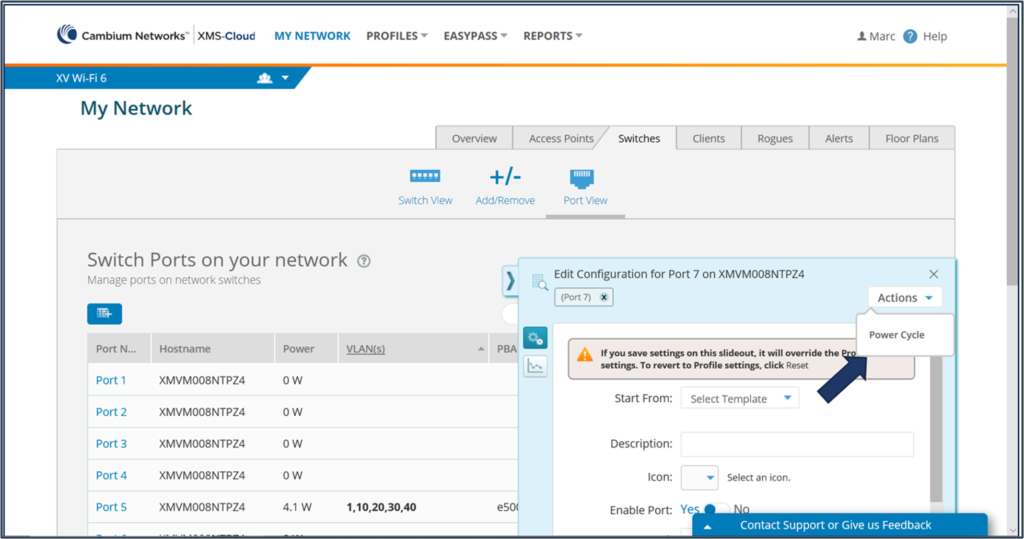
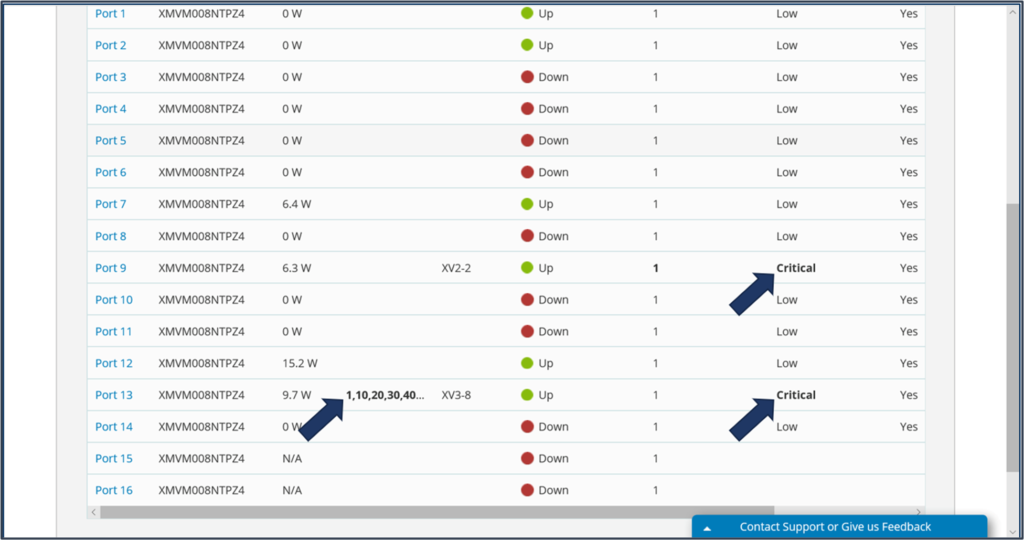
Another enhancement is that you can now quickly review which switch ports and which options have been configured by a PBA policy by going to My Network → Switches → Port View. Look for the PBA Policy column to see which PBA policy has been implemented for that port and any options configured by the PBA Policy will be displayed in a BOLD font.
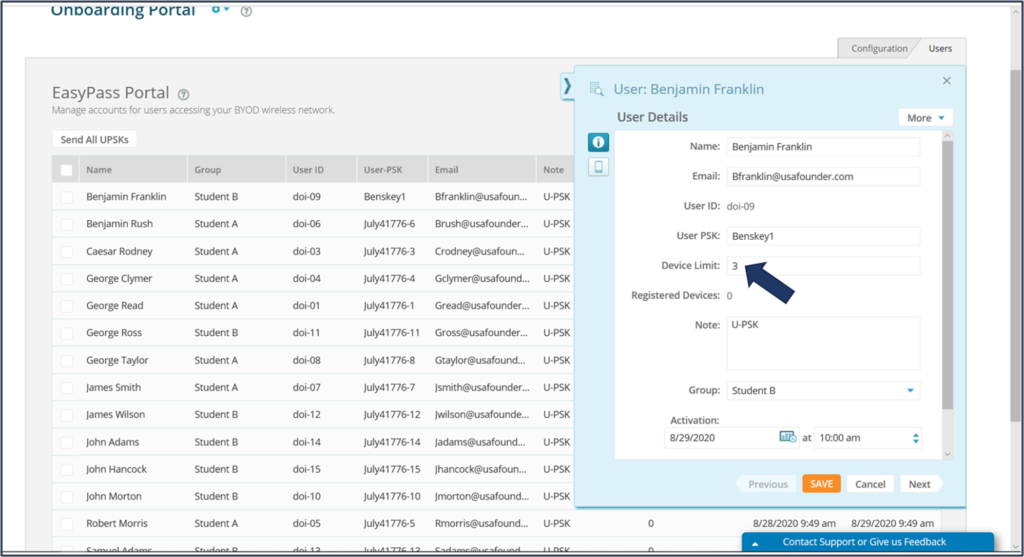
EasyPass Onboarding – Modify device limit per user
EasyPass Onboarding now allows you to change the maximum number of allowed registered devices on a per user basis. To increase or decrease the maximum number of allowed registered devices for an individual user, go to Easypass, open your existing Onboarding portal and click the Users tab. Hover your mouse over the user account you want to edit and click the View/Edit User Details button. On the User Details fly-out window, you can now adjust the maximum number of registered devices for that individual’s account.
SSID Template supports advanced options
When creating an SSID template which can later be used to easily create SSIDs in any profile, you now have the option of configuring advanced features such as assigning a default QoS, AP and client traffic limits, client counts, and station-to-station blocking.
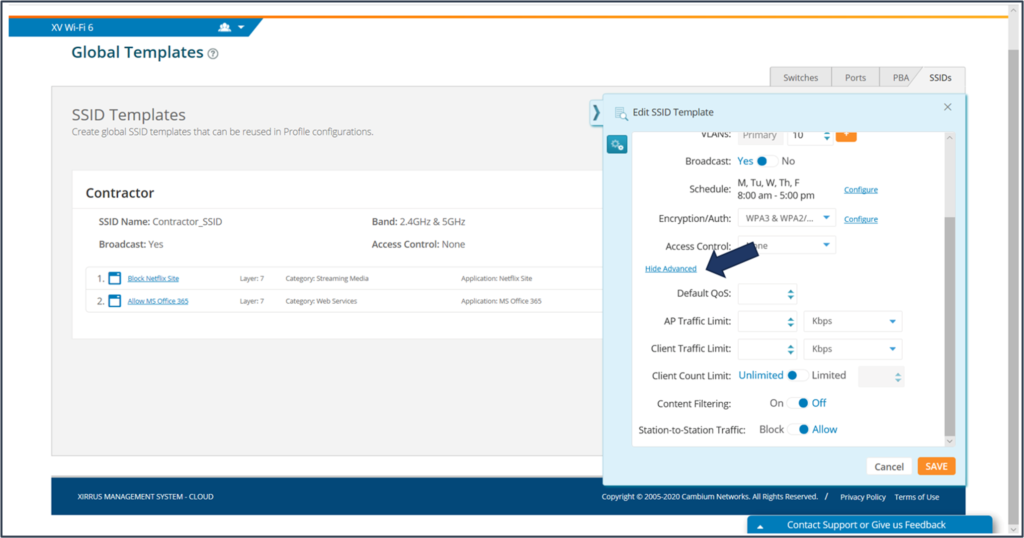
To configure the advanced features on an SSID template, go to Profiles → Templates → SSIDs → New Template → Show Advanced. Or select and existing template, click Edit → Show Advanced. Configure the necessary advanced settings and click Save.
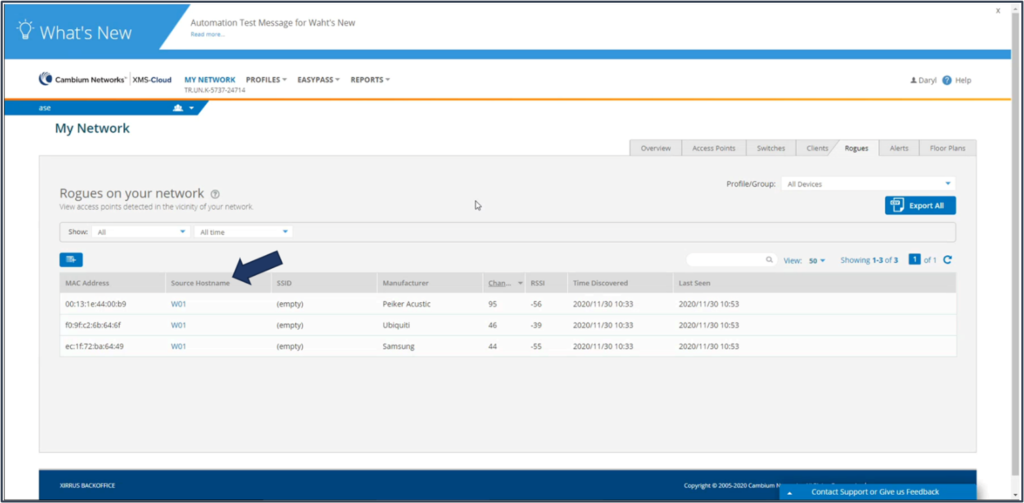
Wi-Fi 6 Rogue device polling
XMS-Cloud now provides information on rogues detected by Cambium XV-series Wi-Fi 6 access points. To review the rogue data, go to My Network → Rogues. Data on all rogue devices detected in the area will be displayed.
Show Replaced AP Status in Add/Remove tab
There will be times when you need to replace a device on your network. When that occurs, XMS-Cloud will allow you to replace the device, instead of just decommissioning it. The system will show the status of that device as “Replaced”.
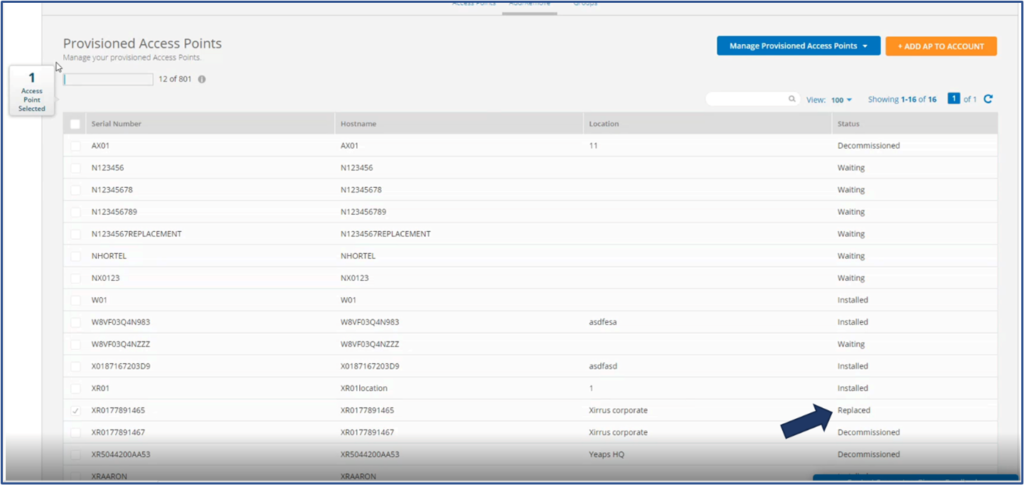
When you go to My Network → Access Points, and click the Add/Remove button, you will see APs that are currently installed or decommissioned. To replace a device, select the decommissioned device you want to replace and click the Replace button. You will be prompted to add the Serial Number of the new device you are using to replace the older device with. Click Replace.
It is important to note that once you replace a device, you will not be able to re-install it without the assistance from our Support team.
CLI access to Wi-Fi 6 APs
On Wi-Fi 6 APs, you are now able to access the CLI through XMS-Cloud. Go to My Network → Access Points. Select an XV series access point and click the View/Edit Access Point Details button. On the Access Point fly-out window, click the Commands button. This will give you access to the CLI for that access point.

Other enhancements include:
Increase in capacity
- SSIDs 8 → 16
- VLANs 32 → 64
- Policies 8 → 16
- User Groups 8 → 16