The January 2021 release of Xirrus Management System – Cloud (XMS-Cloud) is now available. This release includes a number of new features, including a new look for EasyPass access portal pages, new dashboard widgets for cnMatrix switches, the ability to make changes to SSIDs in Profiles using templates, filtering the dashboard by SSIDs, station-to-station blocking within SSIDs, and more.
New Look for EasyPass Access Portals
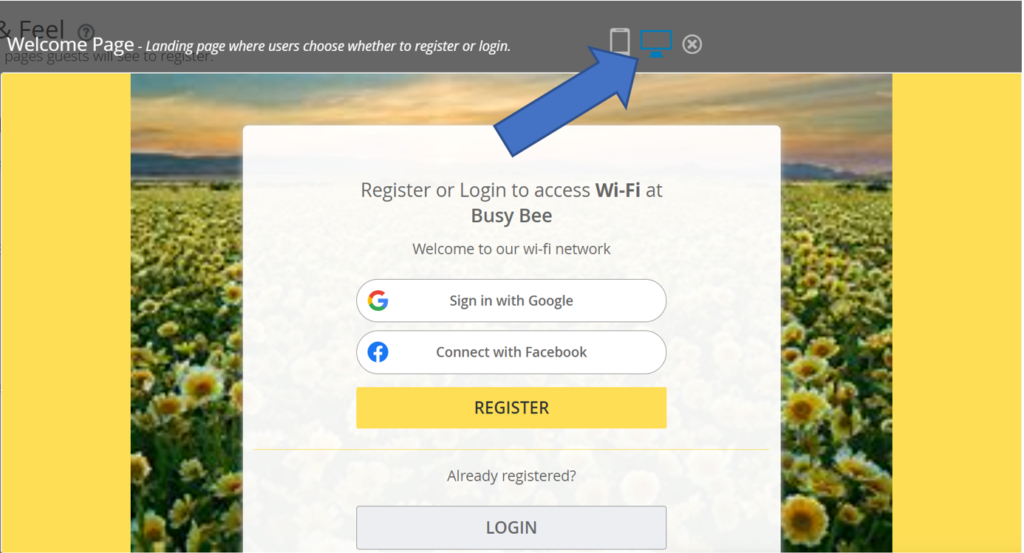
When designing an EasyPass portal, you can now preview the portal in both a mobile device view and a desktop view. We have also refreshed the look & feel of the EasyPass Access Portal pages the end user will see when onboarding their devices in several ways.
To customize an EasyPass portal and preview for desktop or mobile devices, open an existing EasyPass portal or create a new one. Click the small mobile device or desktop icons.

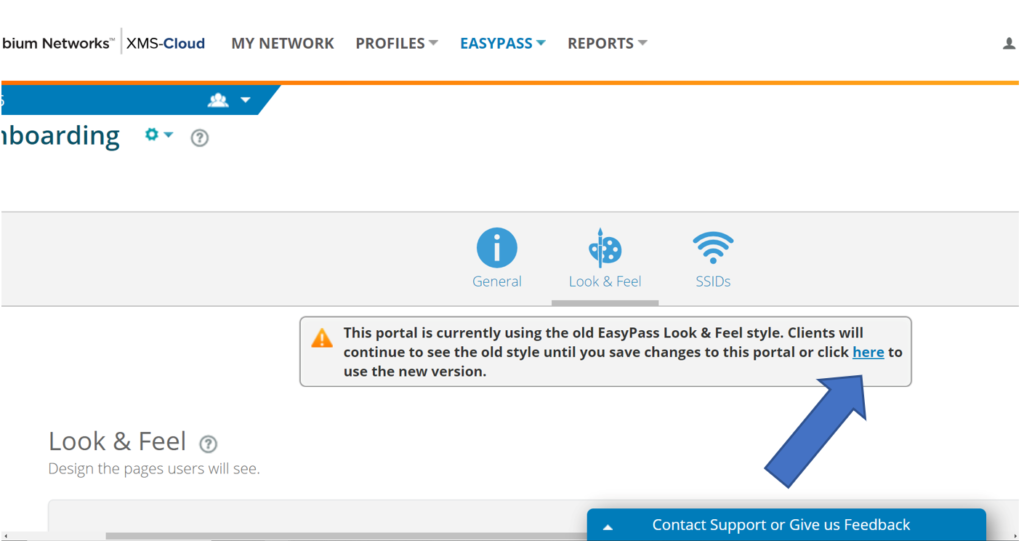
For existing EasyPass Portals, end users will continue to see the old look & feel of the EasyPass pages until you manually update the EasyPass portal by updating or clicking the link in the portal to use the new version. Once you have updated the portal or opted to use the new version, you are unable to go back to the previous look & feel format of the portal.
New configuration features for cnMatrix switches
When creating a Global Policy for a cnMatrix switch port, instead of having that policy applied to every switch port, you can specify which switch ports this policy will be applied to. When creating the Global policy, first select Wired (Switches). Next select the Port icon that best fits this policy.
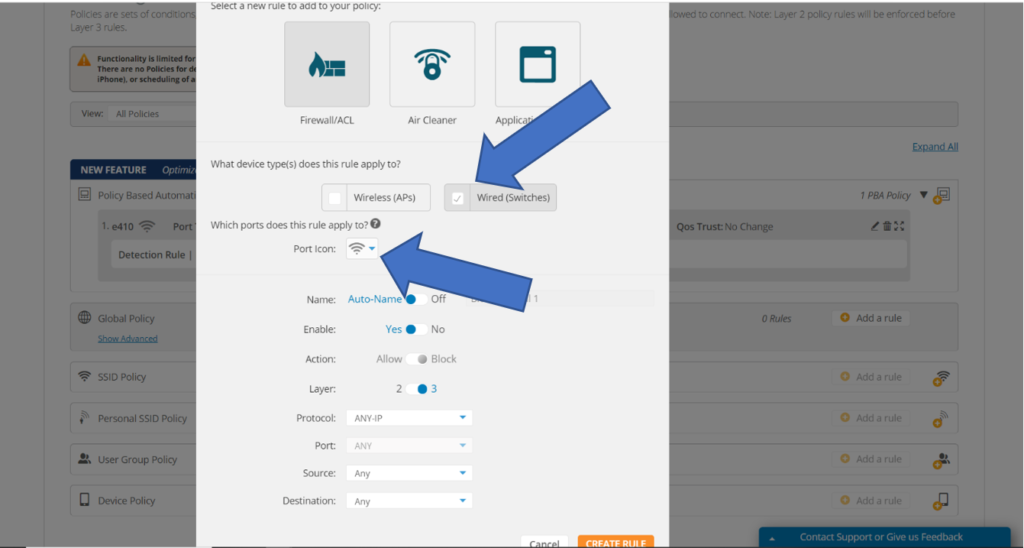
After Saving the Policy, any switch port that is configured with that icon will have the Global policy applied to it.
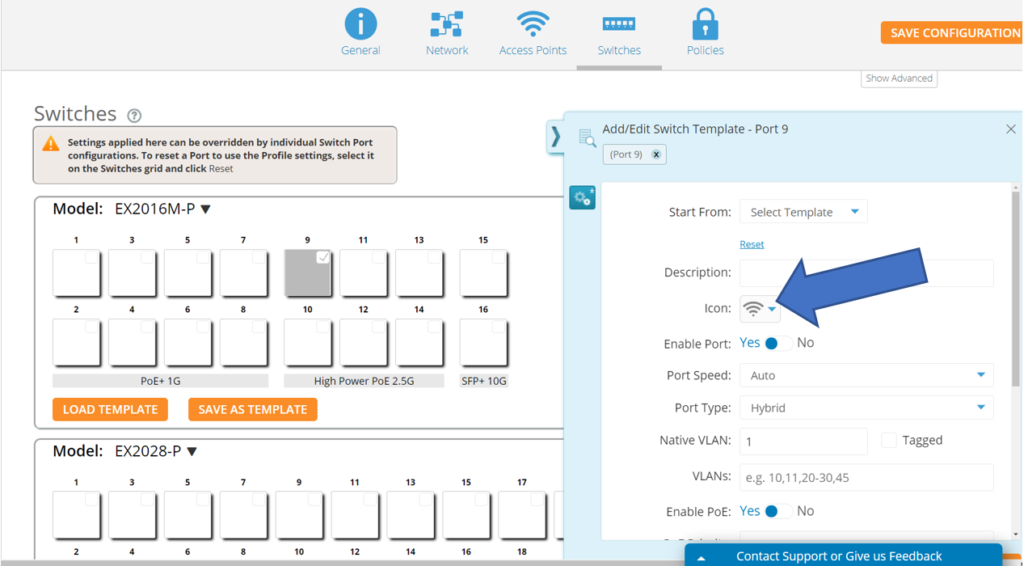
To configure a switch port, create a new Profile or open an existing Profile. On the Configuration page, go to Switches. Click on the port you want to configure and on the flyout window, select the same icon as you chose in the global policy.
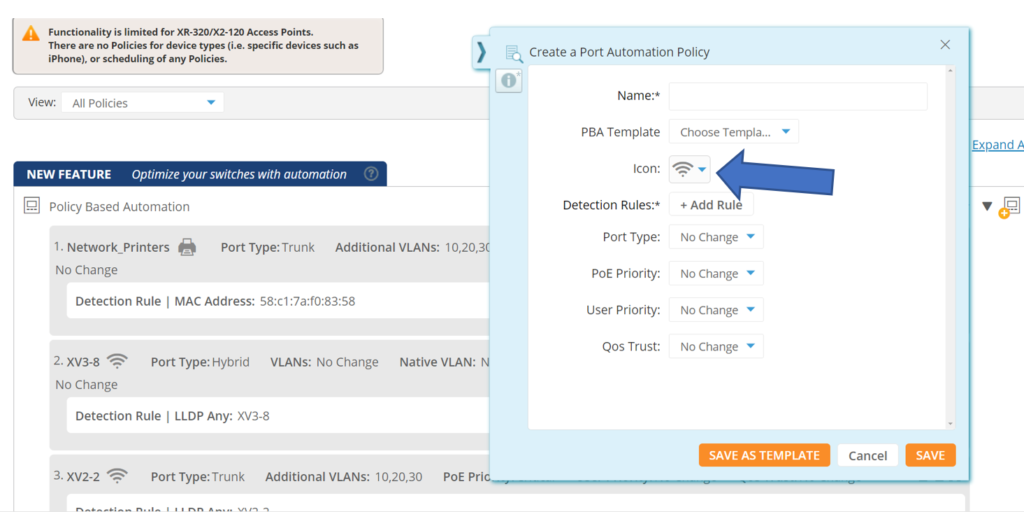
You can also create a PBA policy and while configuring the policy, select the same icon as you chose in the Global policy. To create a PBA policy, create a new Profile or open an existing Profile. On the Configuration page, go to Policies. Create a new Policy Based Automation policy or edit an existing PBA policy. On the Port Automation Policy flyout window, select the same icon as you chose in the global policy.
Dashboard summary widgets for cnMatrix switches
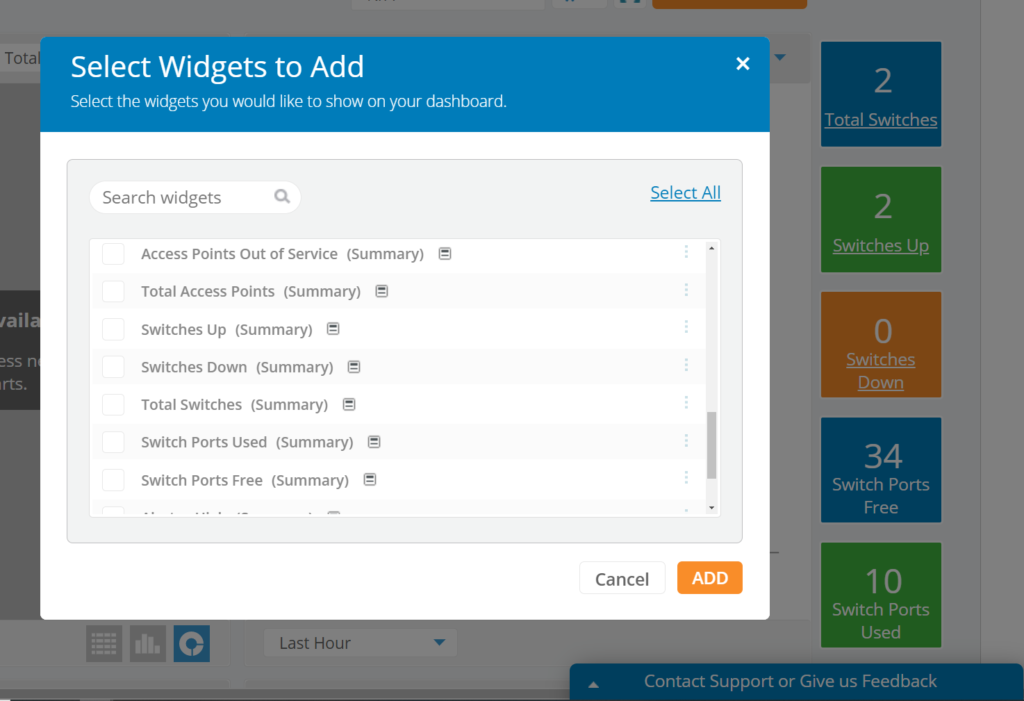
cnMatrix switch summary widgets give you a quick, at-a-glance overview of the status and health of your cnMatrix switches. Similar to access point summary widgets, you can click on the switch summary widgets to focus the scope of the dashboard to show only the switch information. To add the summary widgets to your dashboard, click the ADD WIDGET button and select the switch summary widgets and click ADD.
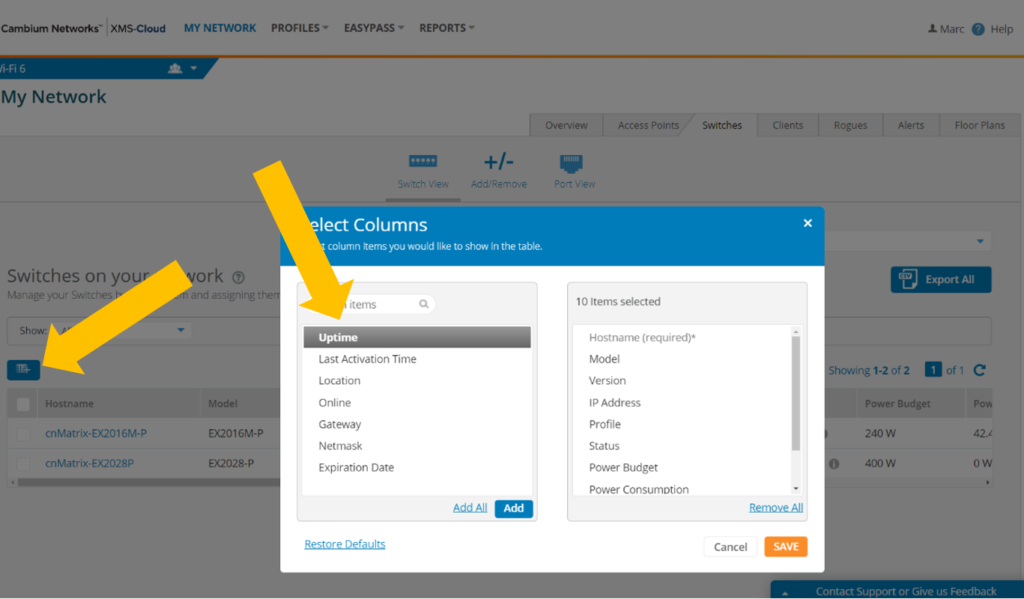
Device Status Uptime Columns
We have added an Uptime column to the access point and switch pages. To access the device uptime information, go to the Access Points or Switches page. Click the blue Grid button. Add the Uptime column to your grid view.
Ability to update SSIDs in Profiles using Templates
If XMS-Cloud detects that you have an SSID template name that is identical to one of your Profile SSIDs, you will have the option to update the Profile SSID from the template. This way you can update Profile SSID passphrases, VLANs or other settings just by applying a template instead of manually changing the SSID in each Profile.
To update a Profile SSID from a Template, go to Profiles and click Templates. Create and configure the template SSID and then name it identical to the Profile SSID. Go to Profiles and then Access Points. Select the SSID you wish to update from the template and then click the Update From Template button.

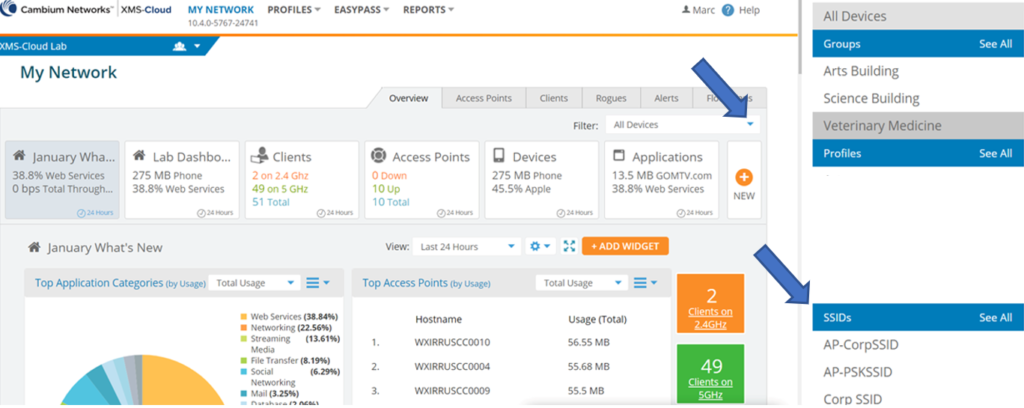
Filter by SSID to narrow focus of Dashboard
You can narrow the scope of your dashboard by filtering by SSIDs. This allows you to quickly focus on data such as Application Usage, Access Points, Clients, Switches and more. To apply the filter to your dashboard, click filters down arrow. Notice you can filter by Groups, Profiles, and SSIDs.
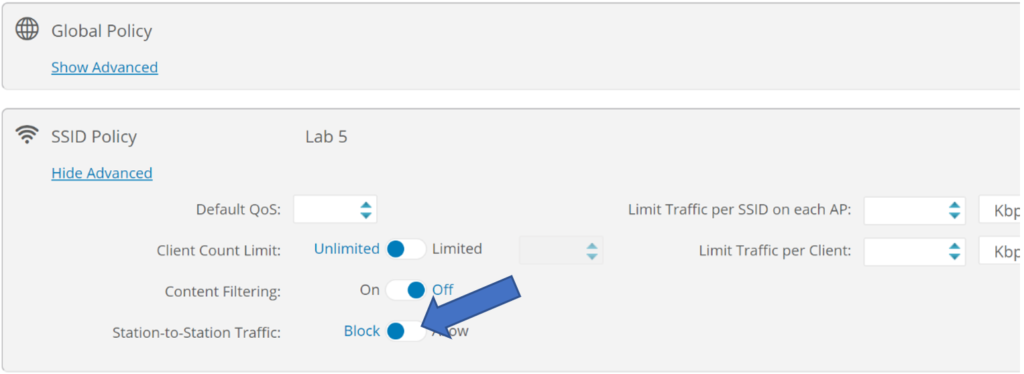
Station-to-Station blocking by SSID in Policies
To preserve Wi-Fi bandwidth or for security purposes, it may be necessary to block station-to-station traffic within an SSID. To block station-to-station traffic in an SSID policy, either create a new Profile or open an existing Profile and go to the Policies page. Create an SSID policy by clicking the New SSID policy button , and choose the SSID you will apply this policy to. On the SSID policy, click the Show Advanced link, then on Station-to-Station traffic, move the slider bar to Block.