The June 2021 release of Xirrus Management System – Cloud (XMS-Cloud) is now available. New features in this release include alerting when radios go offline, retrieving diagnostic logs from APs, additional SSID management options in the EasyPass Personal portal, improved navigation on AP and client details pages, an improved view of the Client Health Score page and more.

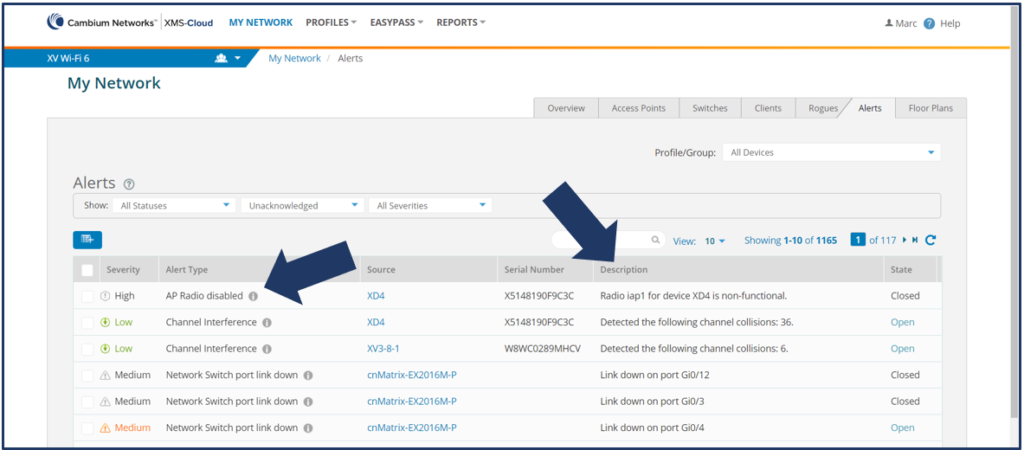
Alerts upon radios becoming disabled or inoperable
When a radio becomes disabled or stops passing traffic, XMS-Cloud will generate an alert that can be viewed on the Alerts page. You can go to the Alerts page to review and acknowledge the Alert. You can configure the system to automatically send you an email or text message when the alert is generated by going to your user profile and clicking Settings. Then scroll down to the Alerts Notifications section and select Email and/or SMS to receive emails and/or text messages when the alert is generated. This feature is available on Xirrus APs only.
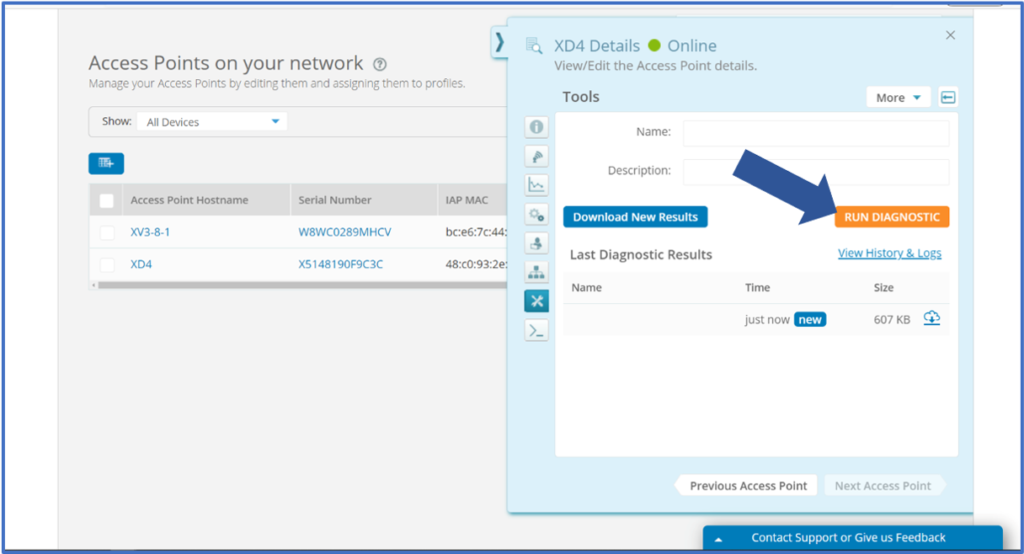
Create diagnostic log from AP details
The access point Diagnostic Log file is one of the most helpful tools an engineer as when troubleshooting access point or client device performance problems. Now you can generate a Diagnostic Log file for Xirrus access points, and a Tech Support file for XV Wi-Fi 6 access points directly from XMS-Cloud. To generate a Diagnostic Log or Tech Support file in XMS-Cloud, go to the Access Points page and select the access point you are working with and on the popup window, click View/Edit Access Point Details. On the fly-out window, click the Tools button and then click the RUN DIAGNOSTIC button to generate the diagnostic log file. You can download the file to your local system by clicking the Download button.
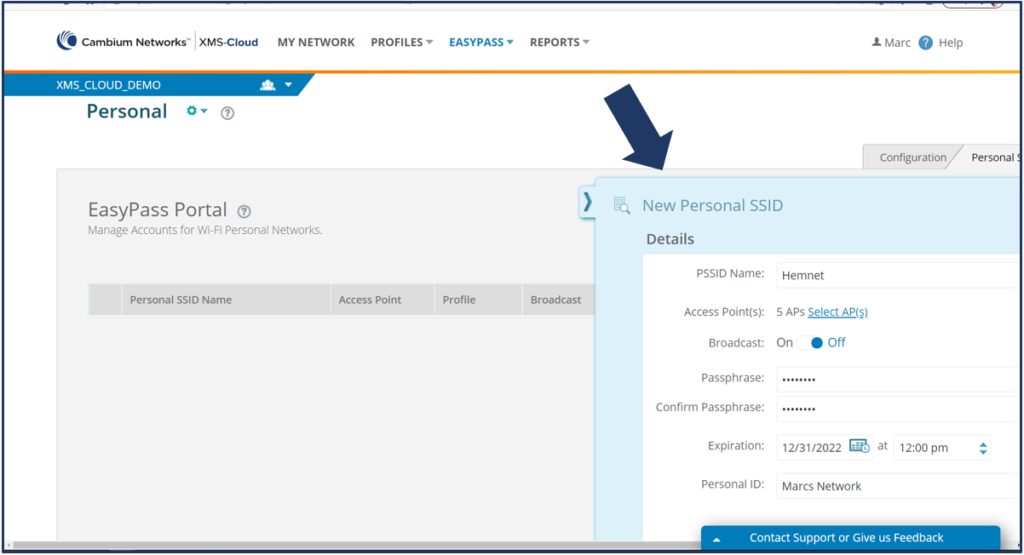
Manage personal SSIDs in the EasyPass Personal portal
In environments where clients are using the EasyPass Personal portal and need to roam to neighboring APs, you are able to create and add the client’s Personal SSID to neighboring APs. This makes it possible for client devices to roam between APs while still staying connected to their personal SSID. Open your EasyPass Personal portal and go to the Personal SSIDs page. Create the Personal SSID which will be added to neighboring APs by clicking the New PSSID button. On the fly-out window, give the new Personal SSID a name which will match the clients personal SSID, add the new PSSID to the APs that the client will roam to, assign a password, an expiration date, and a personal id which is a description of the new personal SSID. The maximum SSID count on all APs except the XR-520 is 16. The XR-520 supports 8 SSIDs.
Improved navigation on AP and Client Widgets and Details pages
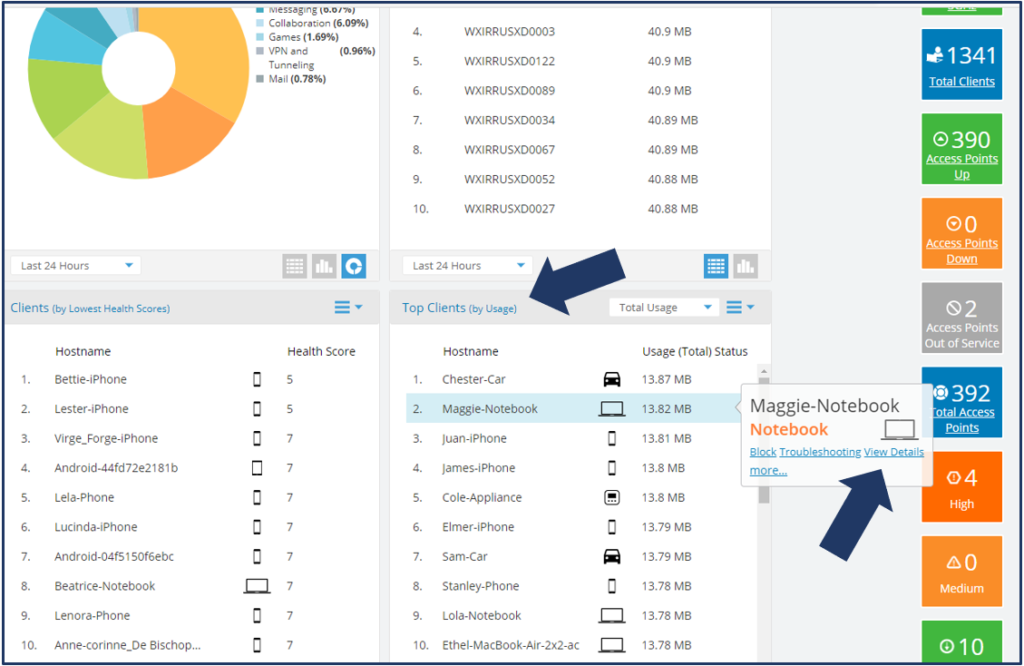
We have improved the drill down capabilities on the Dashboard Top Access Points by Usage and Top Clients by Usage widgets. Hover your mouse over an AP or Client in these widgets and on the pop up window, click the View Details link to click through to the details page for the AP or client.
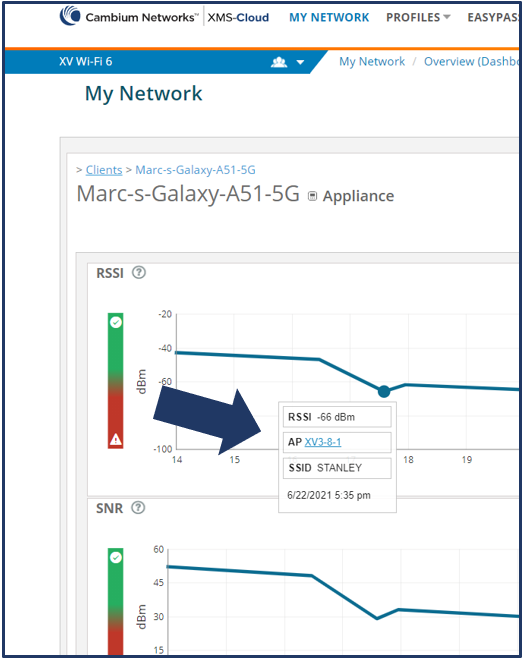
On either one of the Details pages, hover your mouse over any point in time on the graph and a pop up window will show you details about the AP or client connection. On the client details page, you can click on the AP Name link and the system will re-direct you to the details page of that AP.
Breadcrumbs follow click-through actions to allow easy navigation to original page
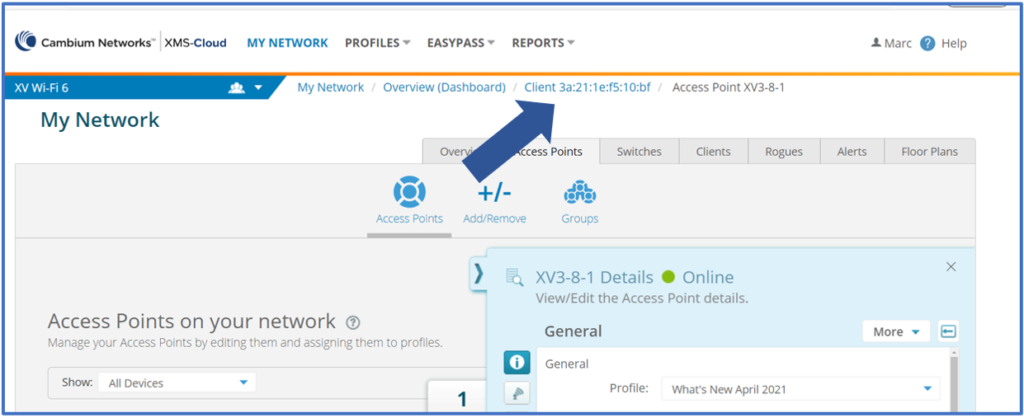
A new breadcrumb feature makes navigation from clients to access points very simple. You can move directly to client devices or APs by clicking a single link as opposed to going back a page. The breadcrumbs are near the top of the page and are very useful when troubleshooting AP and client issues.
Improved view of Client Health Score page
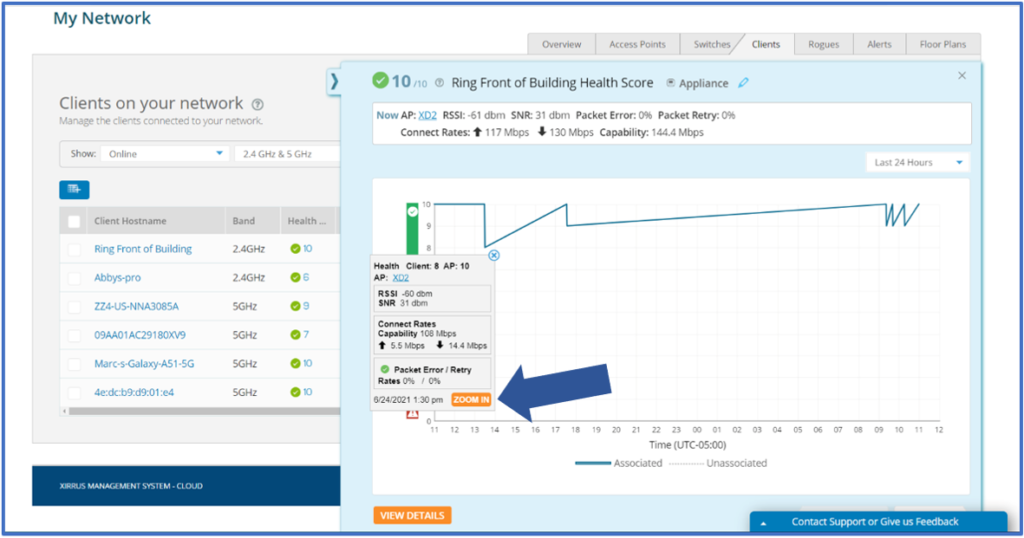
When reviewing client device performance statistics on the Client Health Score fly out window, hover your mouse over any time point in the graph and a popup window will show you information about the health statistics for that client. Click on that point and a Zoom In button appears that you can use and the graph zooms in to focus statistics on a two hour window.
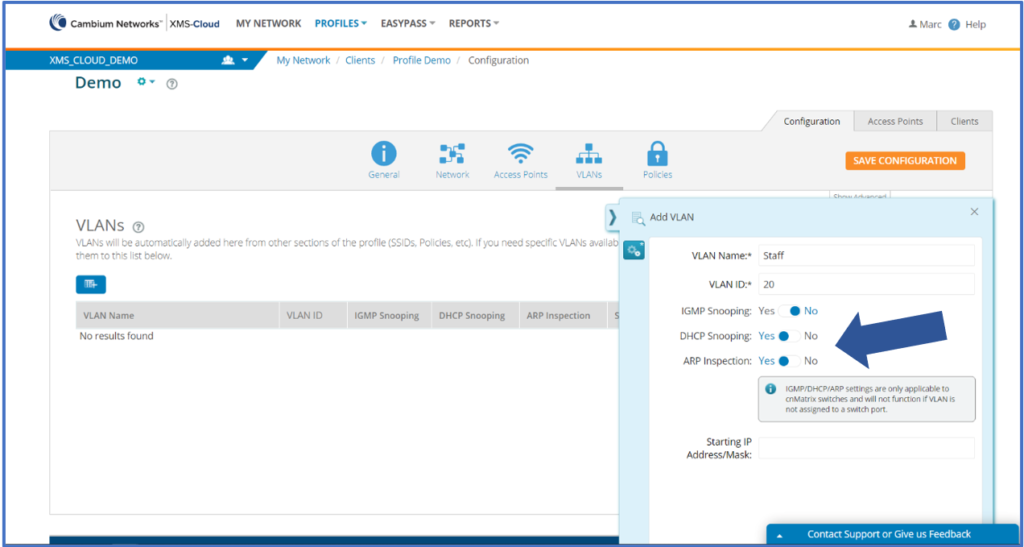
DHCP snooping and ARP inspection available in VLANs configuration
When configuring VLANs, you are able to enable or disable DHCP snooping and ARP inspections. Start by enabling DHCP snooping on a Profile level. Open the Profile, go to the Networks page and enable DHCP Snooping.

Then go to the VLANS page and enable DHCP Snooping and ARP Inspections.
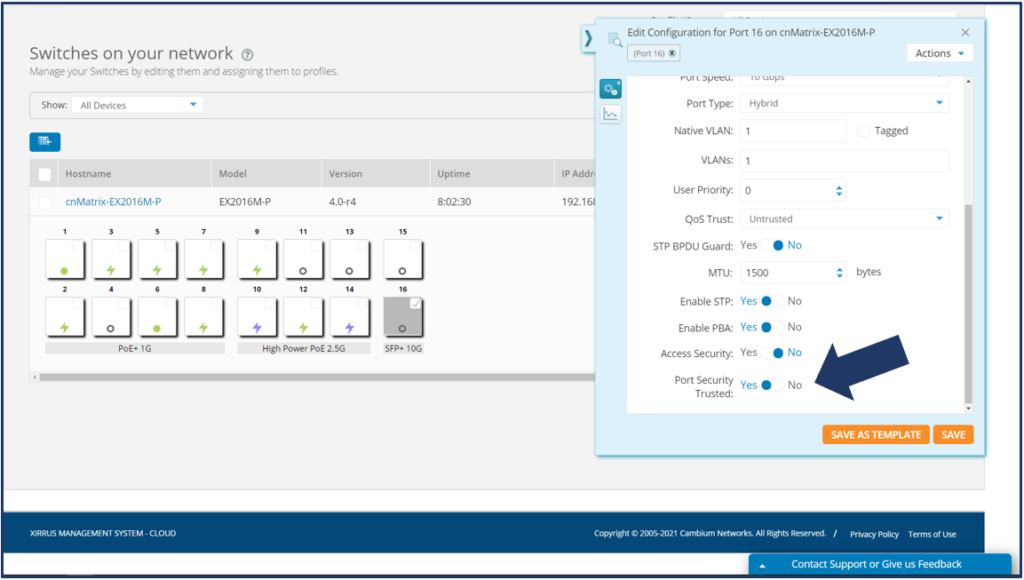
cnMatrix improvements include trusted port
Along with DHCP Snooping and ARP Inspections is the ability to assign a cnMatrix switch port as a trusted port. This is used to configure uplinks ports so they don’t get arp inspected or dhcp snooped. To configure a cnMatrix switch port as a trusted port, open your Profile and go to the Switches page. Click on the port you want to configure, and on the fly-out window, scroll to the bottom and select Yes to Port Security Trusted.