The September 2021 release of Xirrus Management System – Cloud (XMS-Cloud) is now available. This release includes multi-factor authentication for XMS-Cloud administrators, EasyPass Personal enhancements, management of EasyPass Vouchers in the Guest Ambassador user role, BLE support for Aeroscout services, the ability to add notes to the AP details page and XMS-Cloud will retain a history of Profile changes.

Multi-factor Authentication
XMS-Cloud now supports multi-factor authentication for administrator logins. The system interacts with just about any Multi-Factor app such as Google Authenticator, Microsoft Authenticator, Authy, CyberArk Identity, Duo Mobile, or LastPass Authenticator.

You can require all users in an XMS-Cloud tenant to use multi-factor authentication, or you can specify that only certain individuals that must use multi-factor authentication.
To enable multi-factor authentication on all users in an XMS-Cloud tenant, click your User Icon > Settings > System. Under Multi-Factor Authentication, move the slider to Yes.
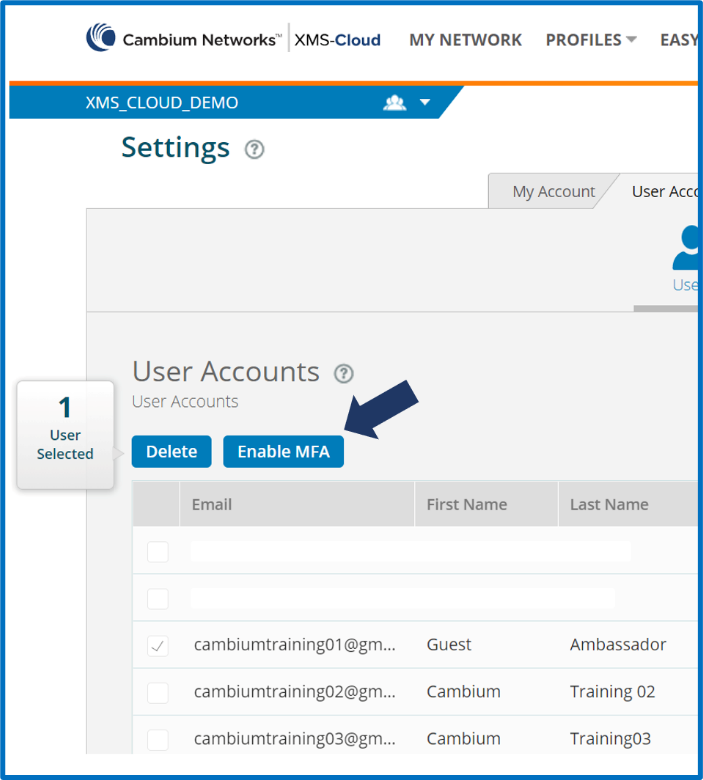
To enable multi-factor authentication for only certain users, go to the User Accounts window, select a user and click the Enable MFA button.
The next time the user logs into XMS-Cloud, he will be prompted to setup MFA using this favorite Authentication App. He can scan a QR code or manually enter a system generated code and then enter a one-time code generated from the App to complete the multi-factor authentication setup process.
You can manage MFA for a user by going to User Icon > Settings > User accounts and selecting the user account. You can then either disable or reset the MFA.
EasyPass Personal Portal SSID Selection
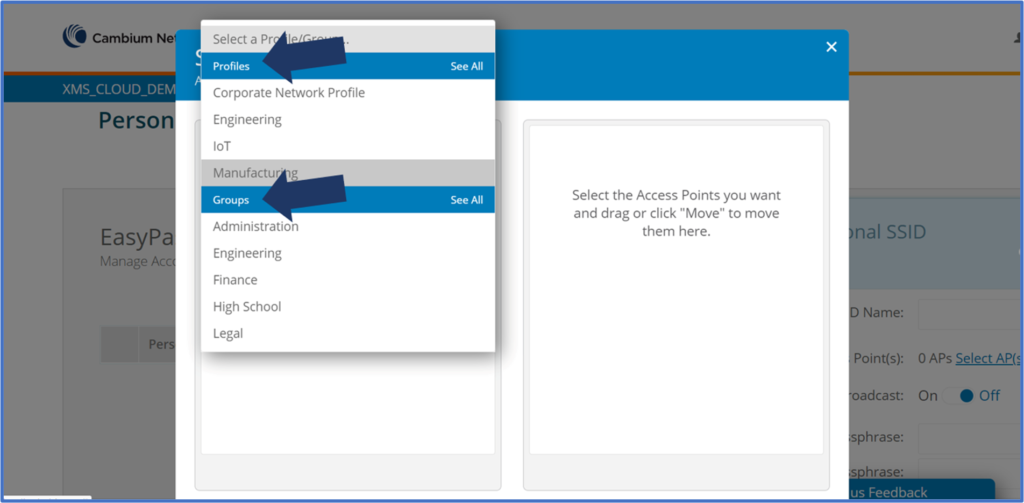
When creating a New Personal SSID and assigning access points to the new SSID, you are able to filter access points by Profiles or Groups. The additional filtering capabilities makes it quicker and easier for the administrator to locate the appropriate SSIDs to add to the Personal SSID. To add a Personal SSID and access points using the Profile or Group filter, go to EasyPass and open your existing Personal Wi-Fi access portal. Go to the Personal SSIDs tab and click the +NEW PSSID button. When selecting the access point(s) you want to create this SSID on, click the Select AP(s) link, select the Profile or Group the desired AP is a member of, then drag and drop the AP in the right side window to add the AP to the PSSID and click OK.
Update to STANLEY Aeroscout settings
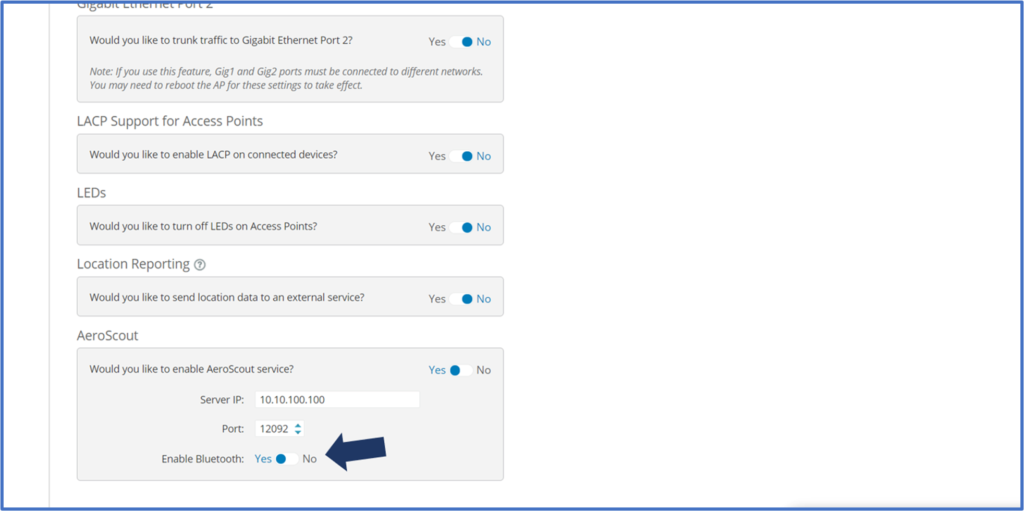
When enabling and configuring XMS-Cloud Profiles for a STANLEY Aeroscout implementation, you can now enable support for Bluetooth devices. To enable Bluetooth support, open your Profile, go to the Access Points page and click the Show Advanced link. Under the Aeroscout section, move the Enable Bluetooth slider bar to Yes. Save the new configuration.
Expanded Guest Ambassador User Role
The Guest Ambassador role allows for Guest management on the EasyPass Guest Self-Registration and Guest Ambassador portals. This role has been expanded to include managing vouchers in the Voucher portal. When users log in with the Guest Ambassador user role and click the “Manage Vouchers” button, they will be able select the Voucher portal and then add or import new vouchers, reset expiration date and delete vouchers.

Add Notes to AP details page
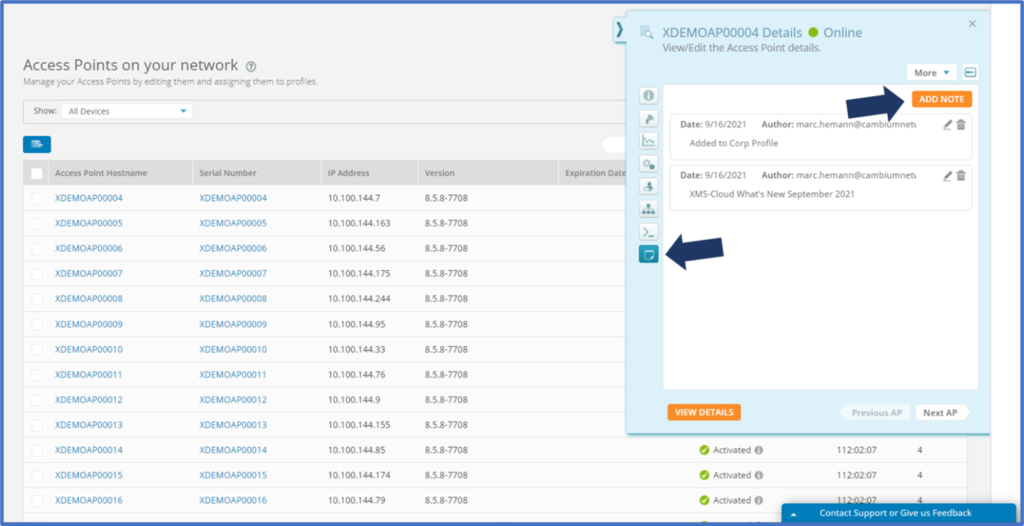
You are now able to add notes to the AP details page that give a historical perspective of activity with that AP. Details such as profile moves, maintenance, support issues or anything else you might want to record will stay with that AP until the note is removed. To add a note to an AP, go to My Network > Access Points. Select an AP and click the Details button. On the AP Details fly-out window, click the Notes button, then click the ADD NOTE button. Enter your note and click ADD.
Profile change history
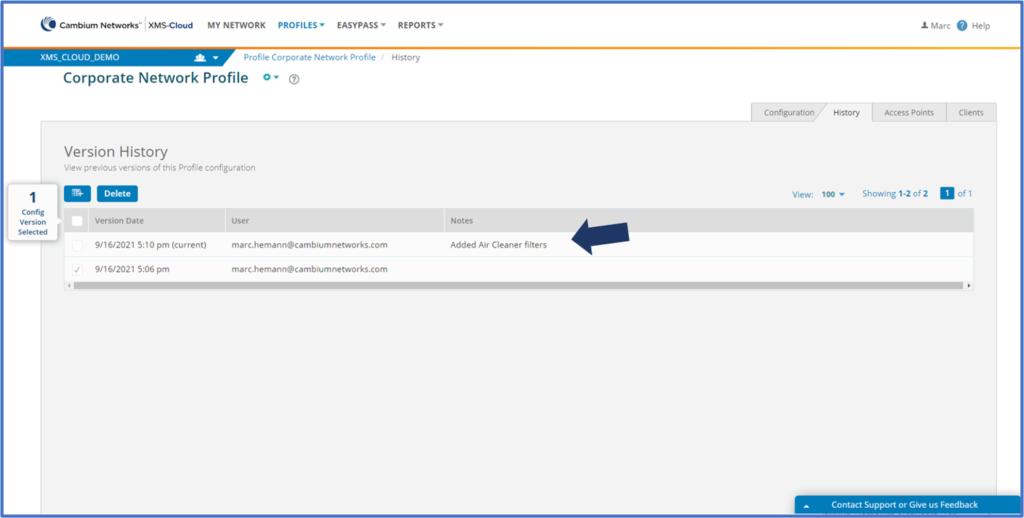
While saving any changes you make to a Profile, you are able to add notes before scheduling or pushing the changes immediately. All changes to the profile will show up on the Profile > History page allowing you to keep track and to audit any changes made to the profile. This can also help when troubleshooting issues as this will leave a trail on the profile changes.
You might determine that a previous configuration works better then the current version. In this case you can select the previous version and click the View Version pop-up window. Select the previous version you want to revert to and click Save Configuration.