The March 2022 release of Xirrus Management System – Cloud (XMS-Cloud) is now available. This new release includes: support for the XE5-8 Wi-Fi 6E access point, 2-month trial cnMatrix switch license subscriptions, support for the cnMatrix TX2012R-P switch, increased visibility into cnMatrix client devices, new PoE Usage widgets on the Dashboard and in Reports, the ability to select the firmware version you need running on your devices, and more.
Click the thumbnail below to view the video:
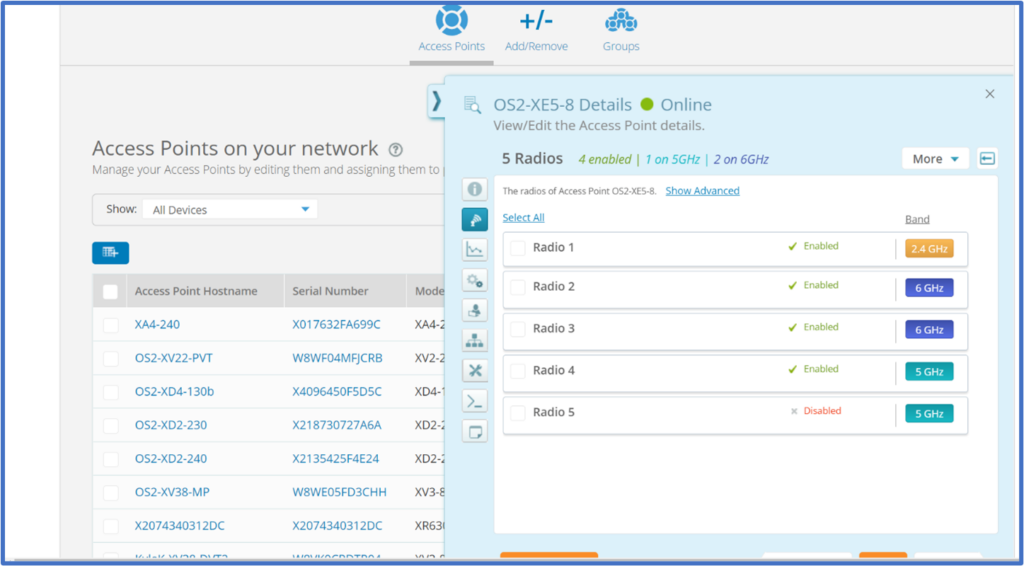
Support for new XE5-8 access points
This release adds support for the 5-radio high density XE5-8 Wi-Fi 6E access point. The XE5-8 is the highest performance Wi-Fi solution in the industry with 5 user radios capable of servicing up to 2500 clients and with 15.6Gbps total Wi-Fi bandwidth. 1 radio is a 2.4GHz radio, 2 radios are 5GHz radios, and 2 radios are software definable radios. They can be configured as 5GHz radios to match today’s client mix of .11ac and 5GHz .11ax clients. In the future, when your client mix matures to include mostly 6GHz clients, you can change the 5GHz radios to 6GHz radios. This feature allows you to deploy a solution that matches today’s clients mix and be prepared to accommodate future 6GHz clients without the need to replace APs with only 5GHz radios. XMS-Cloud supports full configuration and management of the XE5-8, including software-defined radio configuration between 5GHz and 6GHz on two of the five radios.
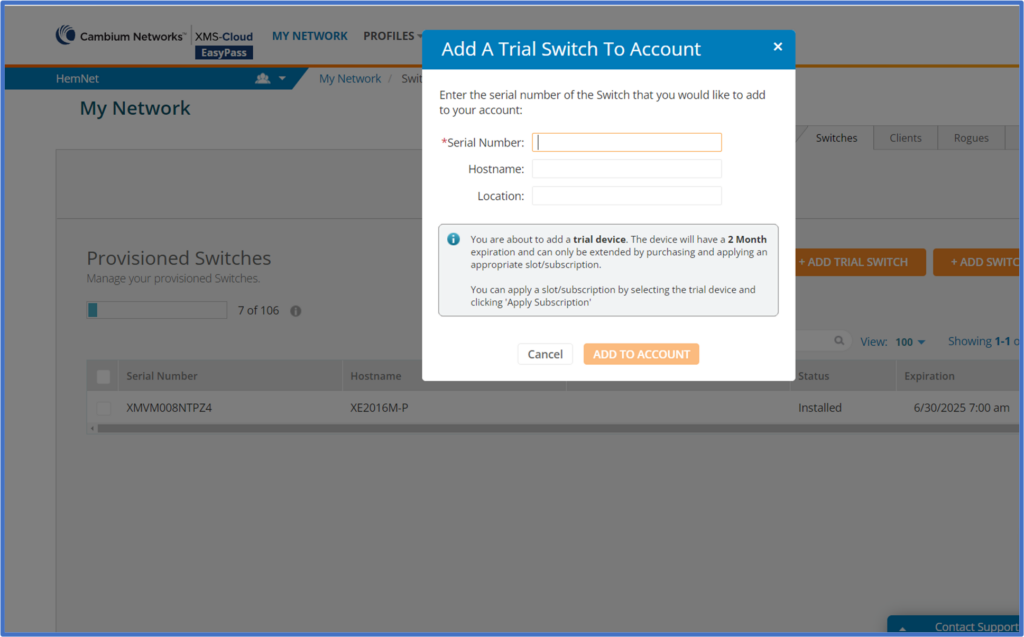
Trial cnMatrix switch license subscriptions
For customers who are evaluating Cambium cnMatrix switches, XMS-Cloud now offers a two-month cnMatrix switch trial license without the need for assistance from Cambium Licensing or Support teams. Convert the trial license to a permanent license by purchasing and applying the appropriate subscription, otherwise the switch license slot will expire after two months. To add a Trial Switch to your account, go to My Network > Switches > Add/Remove > ADD Trial Switch. Enter the Switch serial number and click ADD TO ACCOUNT.
cnMatrix support and connected device visibility
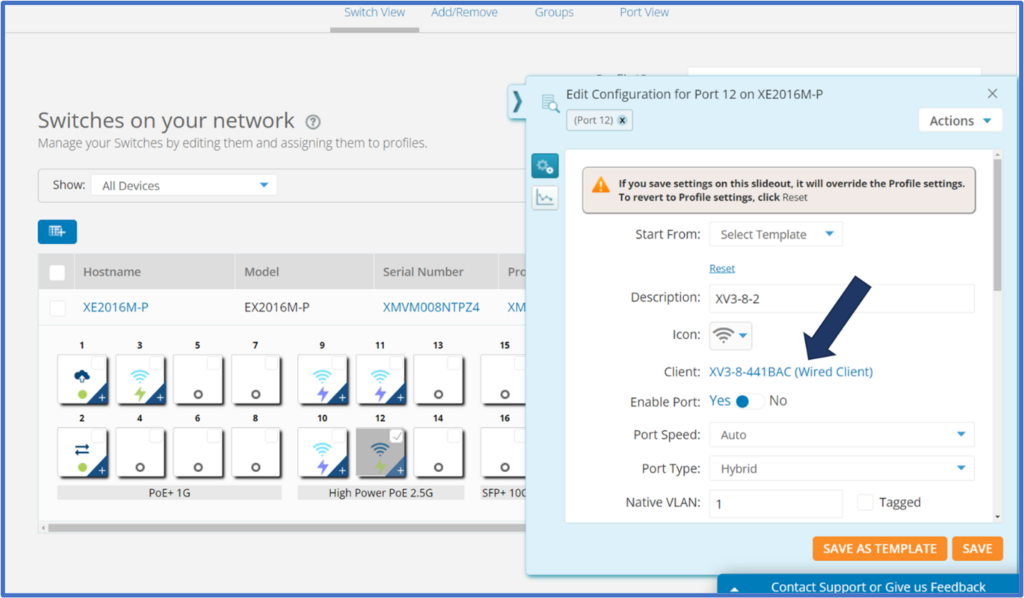
This release adds support for the cnMatrix the TX2012R-P tower switch. In addition, visibility has been added into the device type plugged into a given switch port. When you go to the MY NETWORK > Switches page, select a switch and hover your mouse over an active switch port, the type of device is displayed. When you click on the switch port to reveal the fly-out window, you will see the type of device and client hostname for the connected device. You can click on the client information to go directly to the client device on the Clients page where you can continue to drill down by clicking the client hostname.
Monitor cnMatrix connected device PoE usage
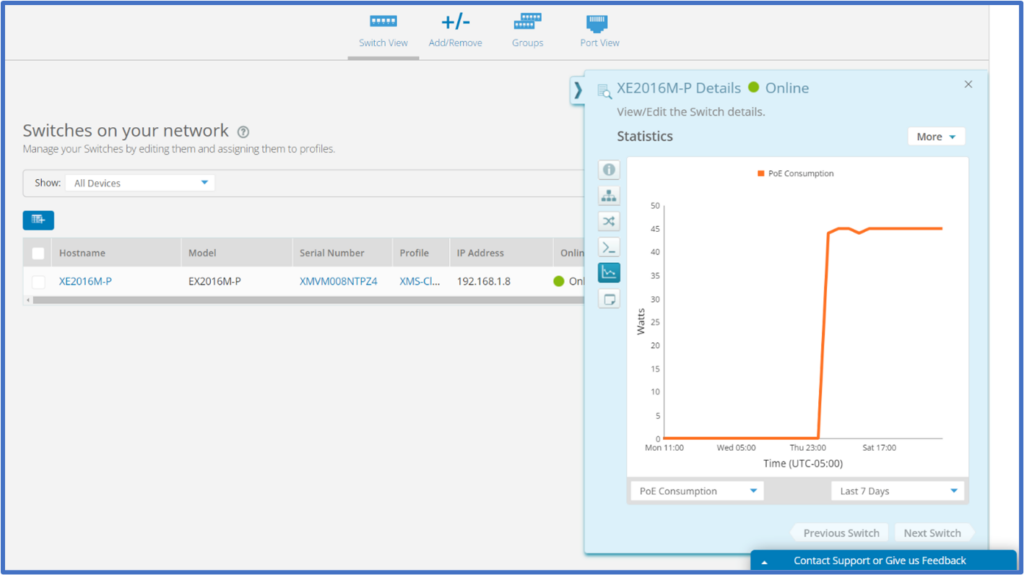
You can review a connected device’s PoE consumption over time by going to the MY NETWORK > Switches page and clicking on the hostname of a switch to reveal the switch fly-out window. On the Statistics > PoE Consumption page, you can review the PoE Consumption graph to determine how much PoE power that switch has been providing over a period of time.
PoE usage widget added to Dashboard
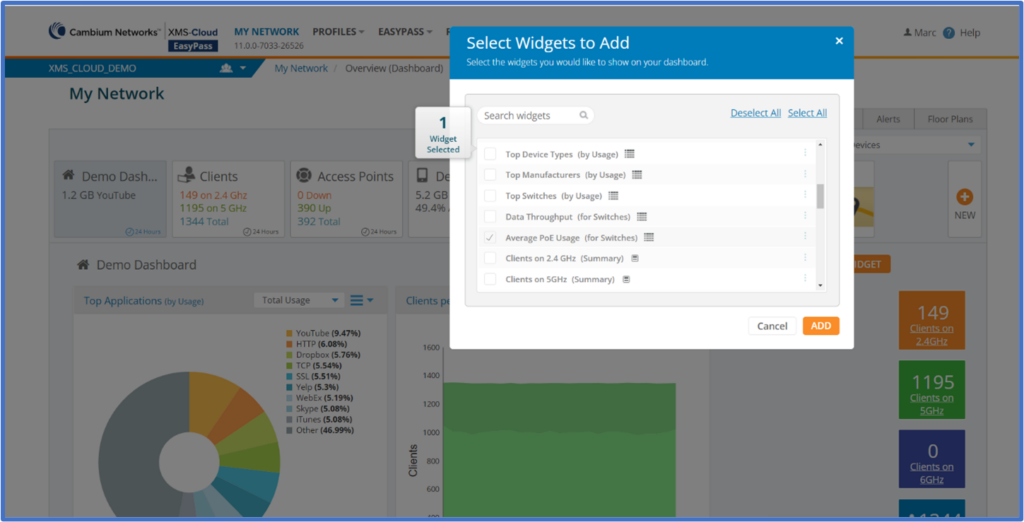
A PoE Usage widget can be added to the Dashboard by clicking ADD WIDGET and selecting the Average PoE Usage (for Switches) widget and clicking ADD. This will display a graph with the average PoE usage for all of your switches over a period of time.
PoE usage widget added to Reports
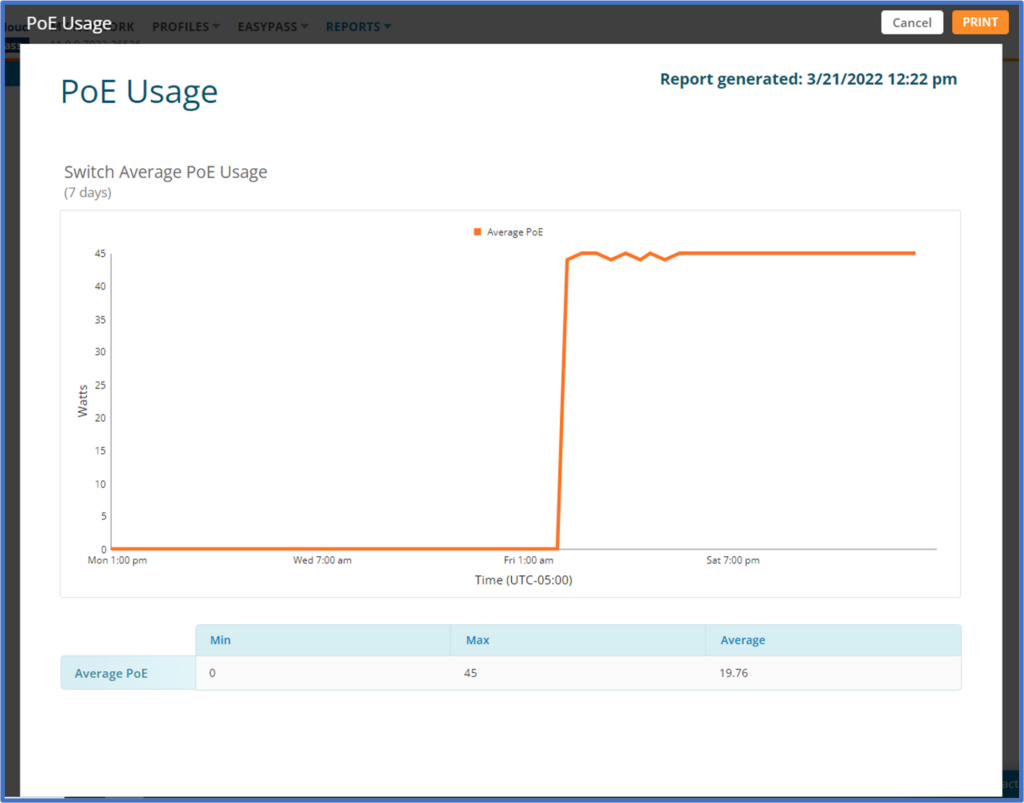
This same PoE usage widget has been added to the reports. To add the widget to a report, go to REPORTS, and create a NEW REPORT. Give the Report a name and click Add Page. Click the Widget drop-down window, select the Switch Average PoE Usage widget, select the time range to report on and SAVE the report.
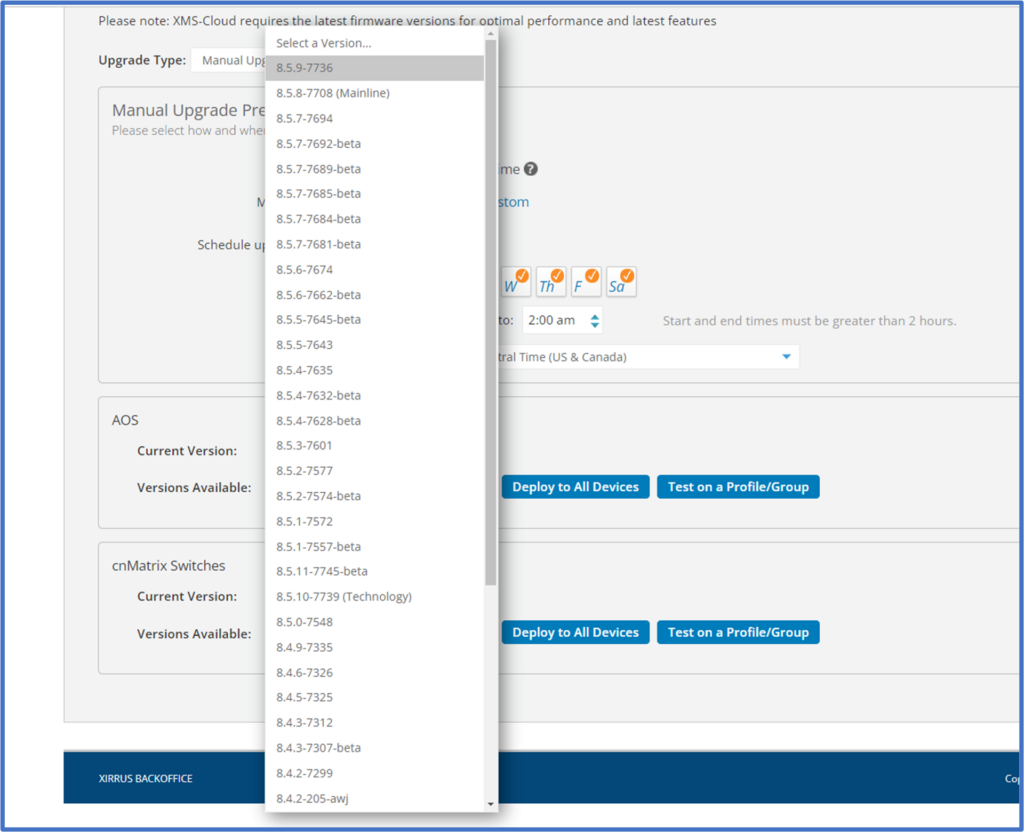
Added flexibility for applying Firmware versions
When managing Firmware Versions and Upgrades, you are able to select the software version from a drop-down window that contains a list of previous firmware versions. To select the firmware version that you need running on your APs and switches, go to your Account Profile > Settings > Firmware Upgrades. For Upgrade Type, select Manual Upgrades. Under the AOS, or CAOS, or cnMatrix Switches section, click the drop-down window next to Versions Available. Then select the firmware version and Deploy to All Devices or Test on a Profile/Group.
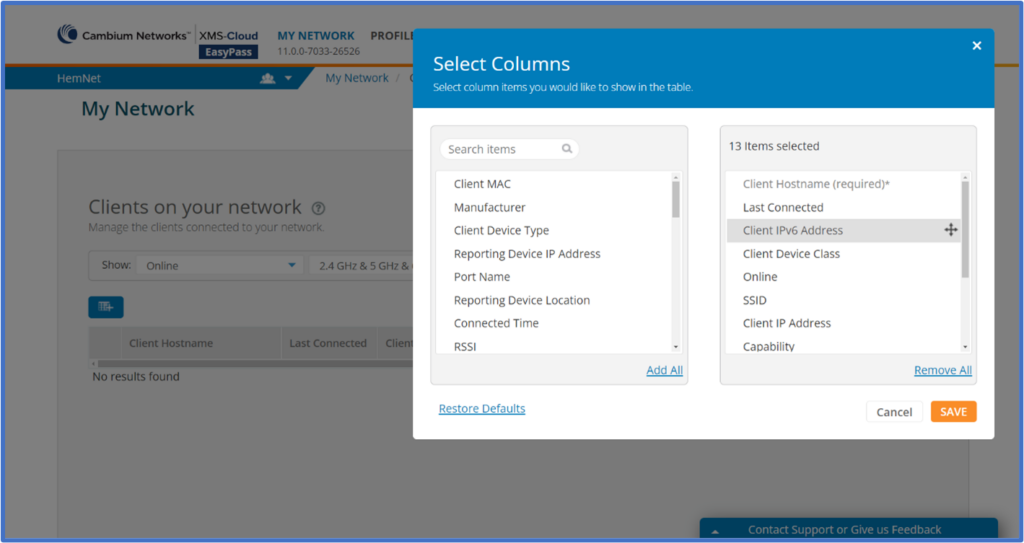
Visibility into Client IPv6 configuration
XMS-Cloud will display client device IPv6 information, including IPv6 addresses, on the Clients page. Configuration of IPv6 information is currently accomplished in the CLI as these features are added as being added to XMS-Cloud. To review the client device IPv6 information, go to MY NETWORK > Clients. Click the Add Columns button, select the Client IPv6 Address widget and move it to the right side of the window and click SAVE.