The May 2022 release of Xirrus Management System – Cloud (XMS-Cloud) in now available. This new release includes a new EasyPass SAML SSO portal, a Wi-Fi 6E Migration Assistant, the ability to combine more than 2 EasyPass portals, new packet capture templates, voice VLAN support in cnMatrix switches, and more.
Click the thumbnail below to view the video:
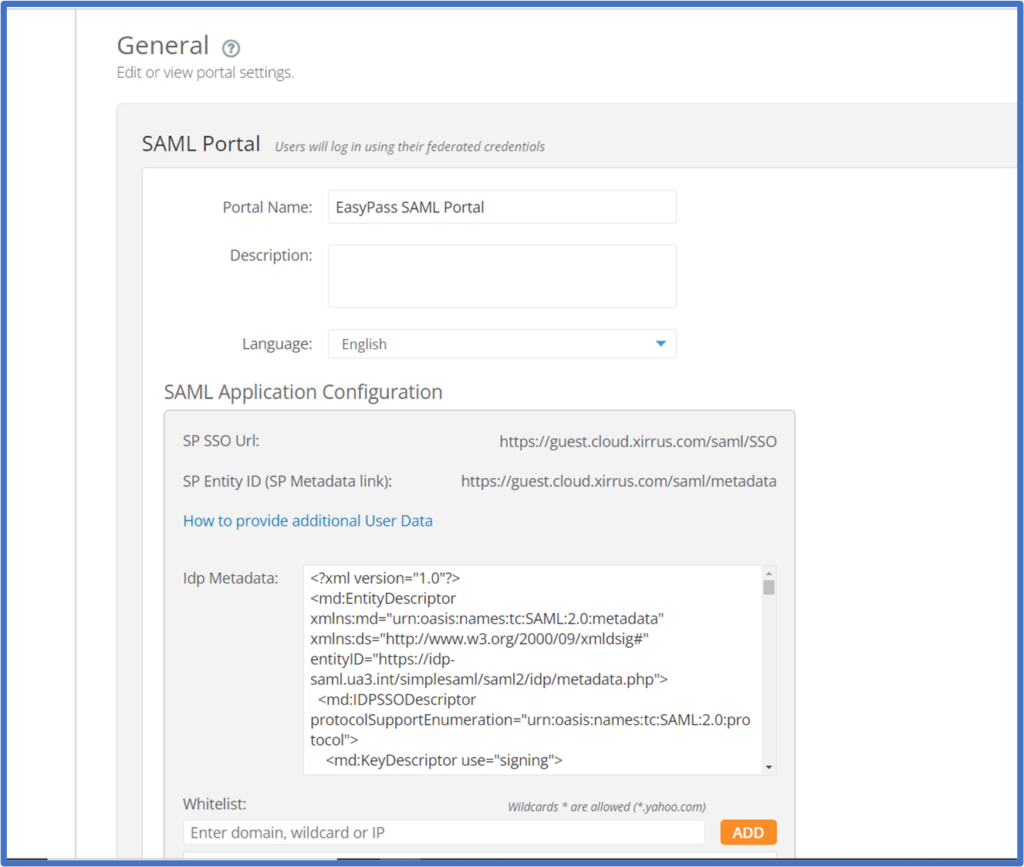
EasyPass SAML portal
EasyPass now offers a SAML Single Sign-On portal that integrates with third-party identity providers. This portal is very similar to our Microsoft Azure and Google login portals. An end user will first authenticate to the third party server and then they will gain access to the network and network resources. To create an EasyPass SAML portal, go to EasyPass > New Portal > SAML. On the General page, you will need to enter the third-party identity provider’s SSO URL and Entity ID. Then you will need to whitelist the required domains to reach your SAML identity provider such as OKTA or CyberArk. The rest of the portal configuration will be similar to the Azure and Google portals. Once clients start using the portal, you will be able to monitor their login information on the Users page.
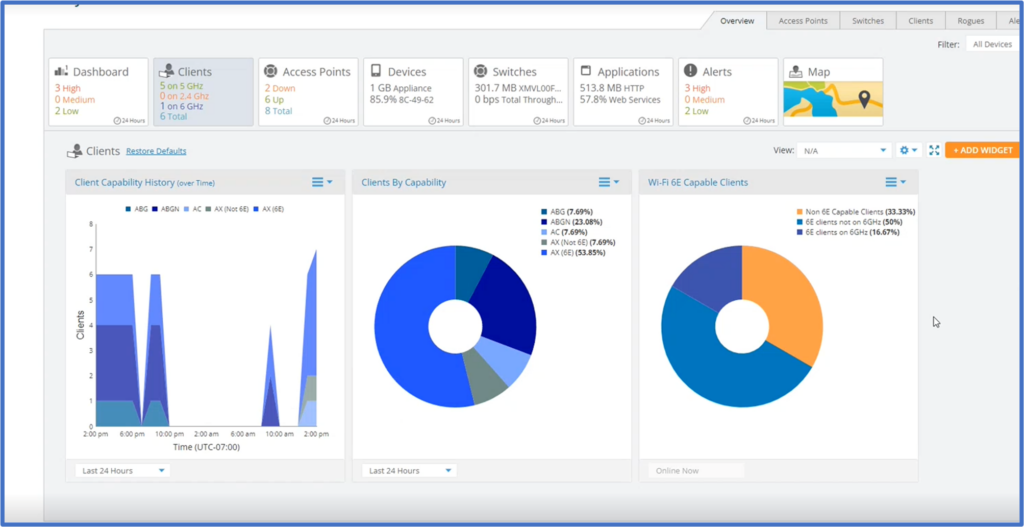
Wi-Fi 6E Migration Assistant
As the number of Wi-Fi 6E clients on Wi-Fi networks increase over time, the software-defined radios (SDRs) in Cambium’s Wi-Fi 6E solutions can be leveraged to manage this transition. The new Wi-Fi 6E Migration Assistant consists of several XMS-Cloud widgets to assist with this. The Clients By Capability widget tracks client capabilities and recommends when it may be appropriate to switch SDR radios from 5GHz to 6GHz. The new Client Capability History widget tracks client device capabilities over time allowing you to monitor 6E client growth trend. This also assists with the decision to change 5 GHz radios to 6 GHz radios. The Wi-Fi 6E Capable Clients shows you the current client device capability mix. To view these new widgets, go to the MY NETWORK > Overview page. Add the new widgets to your dashboard by clicking the ADD WIDGET button. Add the Clients by Capability, Wi-Fi 6E Capable Clients and Client Capability History (over Time) widgets to your dashboard. Hover your mouse over any of the fields in the widgets to reveal a popup window with information for those clients at that point in time.
Client Capabilities on the Clients tab
XMS-Cloud now displays Wi-Fi client device capabilities, i.e. the type of 802.11 technology they support, whether 802.11ax, 802.11ac, etc. To view a client device’s capabilities, go to MY NETWORK > Clients. On the Clients on your network page, client device band Capabilities are shown. A client with a capability of ac indicates 802.11ac is the highest level of Wi-Fi technology that the device supports. A client with a capability of ax indicates the client device is capable of Wi-Fi 6 on the 5GHz band. A client with a capability of ax (6E), indicates the client device is capable of Wi-Fi 6E in the 6GHz band.

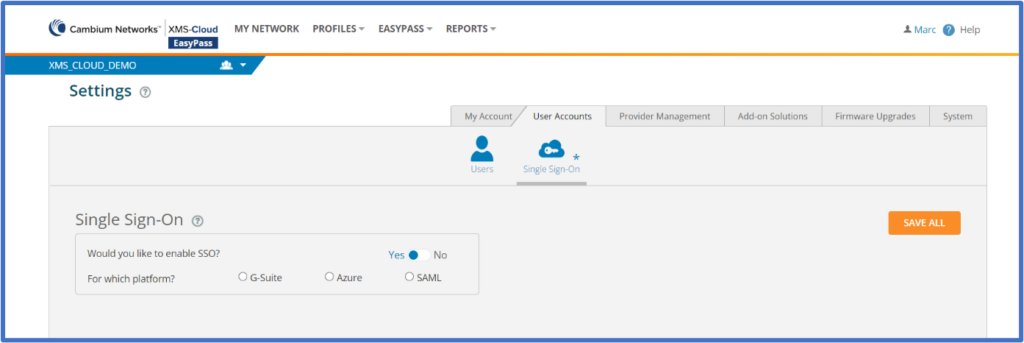
Administrator SAML login
You are now able to configure single sign-on access for XMS-Cloud administrator accounts using a third-party identity provider that uses SAML 2.0. To configure SAML single sign-on access, go to your user profile > Settings > User Accounts > Single Sign-On. Enable Single Sign-On and select SAML.
Combine 2 or more EasyPass portals
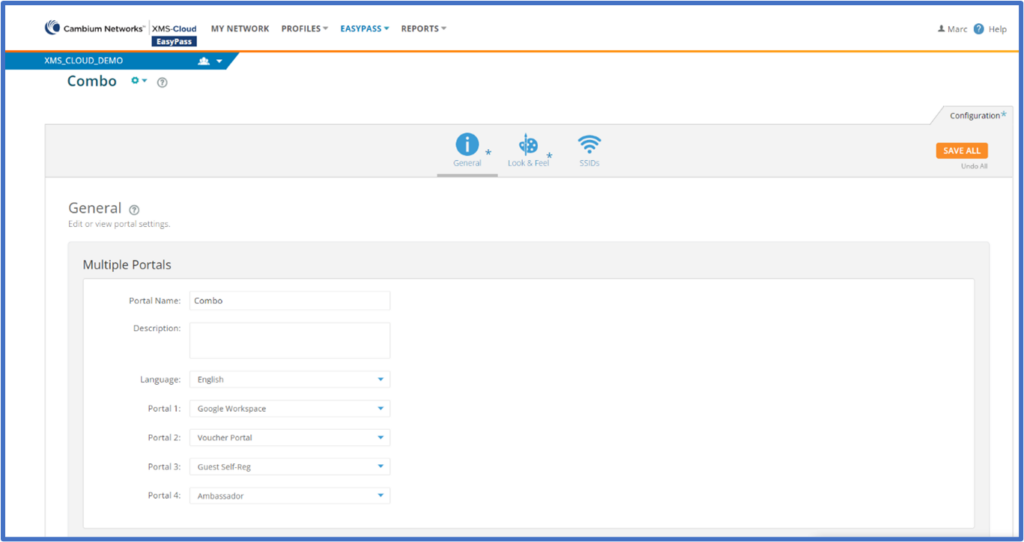
XMS-Cloud offers the capability of combining up to 4 different EasyPass portals on a single SSID to create a portal that is uniquely suited to meet your client device onboarding needs and minimize the number of SSIDs required. To combine EasyPass portals, go to EasyPass > Combine Portals on One SSID. On the General page, select the portals you wish to combine before customizing the look and feel of the landing page and assigning the portal to an SSID.
Enhanced packet capture capabilities
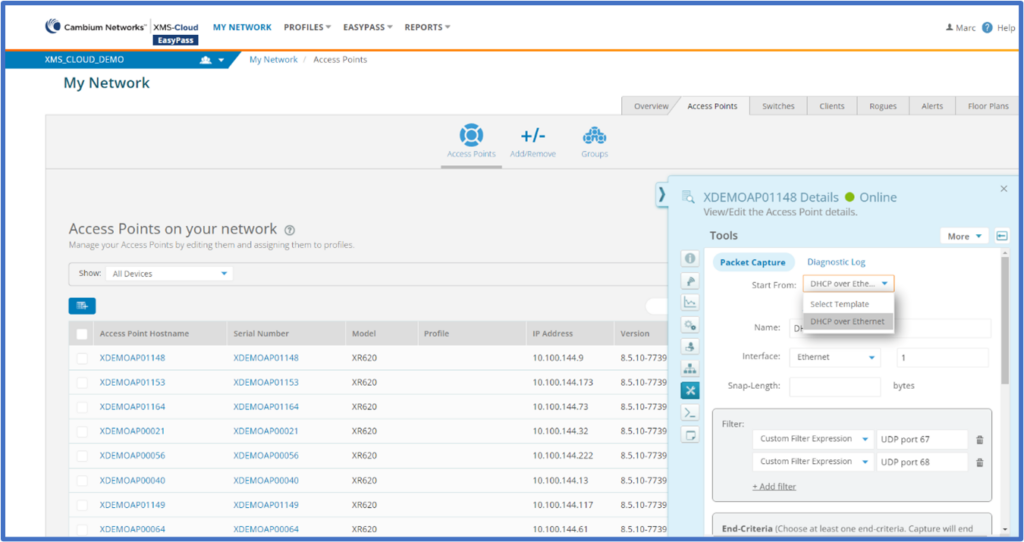
XMS-Cloud has enhanced its Wi-Fi packet capture capabilities by allowing you to create file parameter templates which you can easily apply when creating a packet capture file. This allows for increased efficiency as you will only need to pull up a template instead of configuring individual packet capture files each time. To create a packet capture file template, go to PROFILES > Templates > Capture > NEW TEMPLATE. Configure the new template by adding a name selecting an interface and applying the filters. To apply the template, go to MY NETWORK > Access Points. Hover your mouse over the Hostname of the AP you are working on and click the View Details popup window to access the access point fly-out window. Click the Tools button and go to the Packet Capture page. In the Start From field, click the drop-down arrow and select the desired Template.
Voice only VLAN
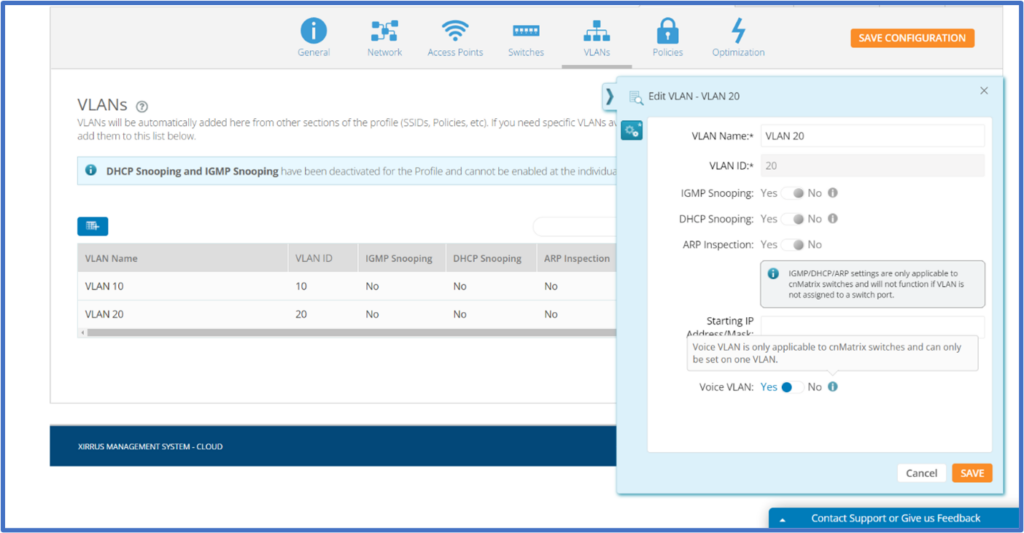
A new XMS-Cloud integration feature with cnMatrix switches provides the ability to set a VLAN exclusively for voice traffic. When selected, TCP traffic will be optimized for performance which is critical for VoWi-Fi traffic. You are only allowed to have one VLAN designated for voice traffic. To designate a VLAN for voice traffic, open an existing Profile and go to the VLANs page. Hover your mouse over the VLAN Name and click the Edit VLAN popup window. On the VLAN fly-out window, select Yes for Voice VLAN.
Ability to deploy configuration to a specific device
Whether it’s done for troubleshooting or testing purposes, there will be times when an AP or switch configuration gets out of sync with the Profile configuration. XMS-Cloud allows you to select an individual device and re-deploy the Profile. To redeploy a Profile to a device, go to MY NETWORK > Access Points and select the access point you want to re-sync. You can also select multiple access points if necessary. Then click the More drop-down window and click Redeploy.
