The February 2023 release of Xirrus Management System – Cloud (XMS-Cloud) is now available. This release adds support for OWE and OWE Transitions SSIDs and enhancements to Dashboard widgets and configuration.
Click the thumbnail below to view the video:

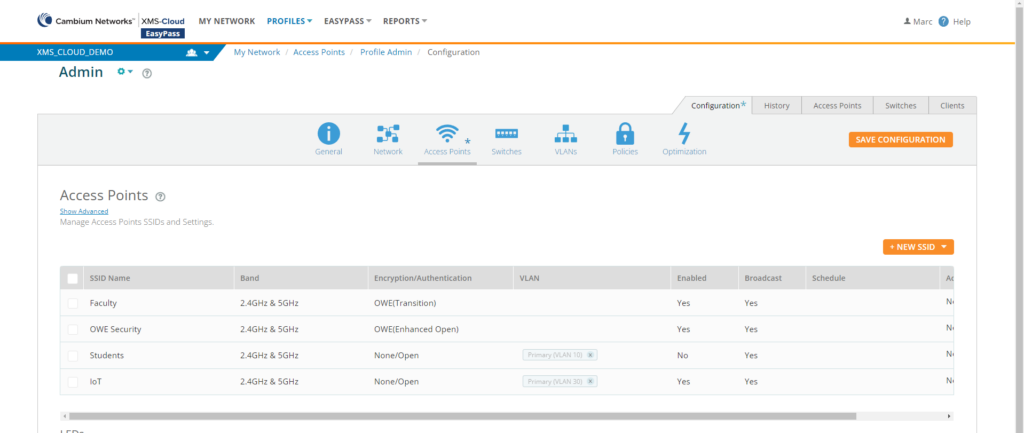
Configuration support for OWE and OWE Transition SSID
XMS-Cloud now supports Wi-Fi 6 OWE (enhanced open) mode and OWE Transition SSIDs for Enhanced Open SSID encryption. OWE will support Wi-Fi 6 clients only. OWE Transition allows you to configure OWE security when Wi-Fi 5 and Wi-Fi 6 clients are using this Open SSID. OWE Transition requires the configuration of 2 SSIDs, one optionally hidden SSID for OWE and a second open SSID that is broadcasted. These SSIDs are linked via the OWE Transition mode. The AP will only send beacons for the open SSID and also carry OWE Transition Mode Information Elements.
When using OWE Transition mode, Wi-Fi 5 clients will connect to the open SSID with no authentication and no encryption. When a Wi-Fi 6 client connects to this Open SSID, they will be redirected to the OWE SSID where OWE encryption will be applied.
To configure OWE Transition, you will first create the OWE SSID. Open your Profile, go to Access Points and click NEW SSID. Give the SSID a name and for Encryption/Authentication, select OWE (Enhanced Open). The next step is to create the Transition SSID. Click NEW SSID, give the SSID a name and for Encryption/Authentication, select OWE (Transition). You have the option of either broadcasting or not broadcasting this SSID.
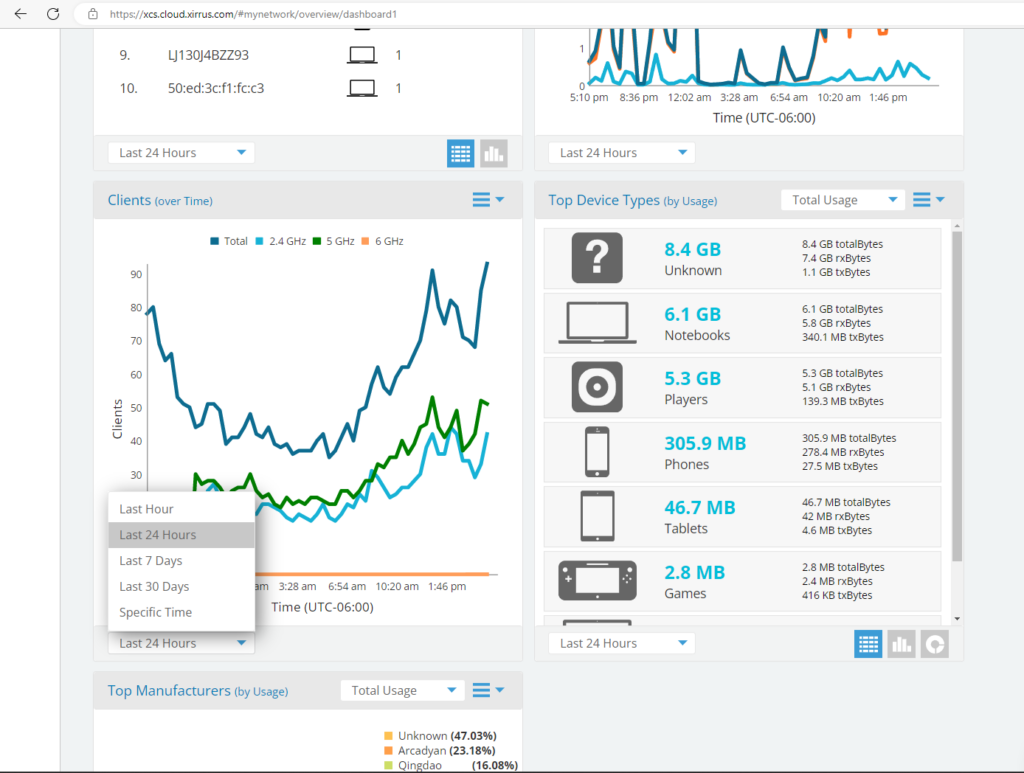
Clients (over Time) widgets breaks out clients per band
The Clients (over Time) widget on the Dashboard now provides a breakout of the number of clients per RF band – 2.4GHz, 5GHz, 6GHz, and a total of all three bands. You can select a time period of the last hour, last 24 hours, last 7 days, last 30 days, or select a specific time period to display. Click on a specific datapoint to Create a custom alert, Zoom in to that specific time.
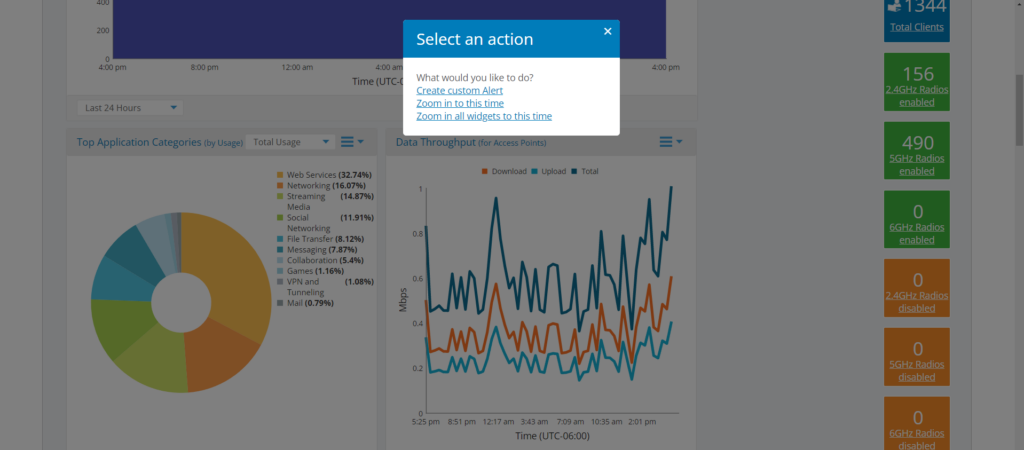
Zoom in on network dashboard data
When reviewing dashboard charts that show data over long periods of time, it can be difficult to pinpoint activity at a certain moment in time. Click on a data point on a chart that you are interested in and a window pops up which allows you to zoom in to the chart at that particular point in time. You also have the option to zoom in all widgets to that point in time. The time period displayed on the widget is 2 hours. You can move the displayed time forward or backwards by clicking the + or – button below the chart. You can also click the time interval drop down window below the widget and select Specific Time and enter the time you want to zoom in on.
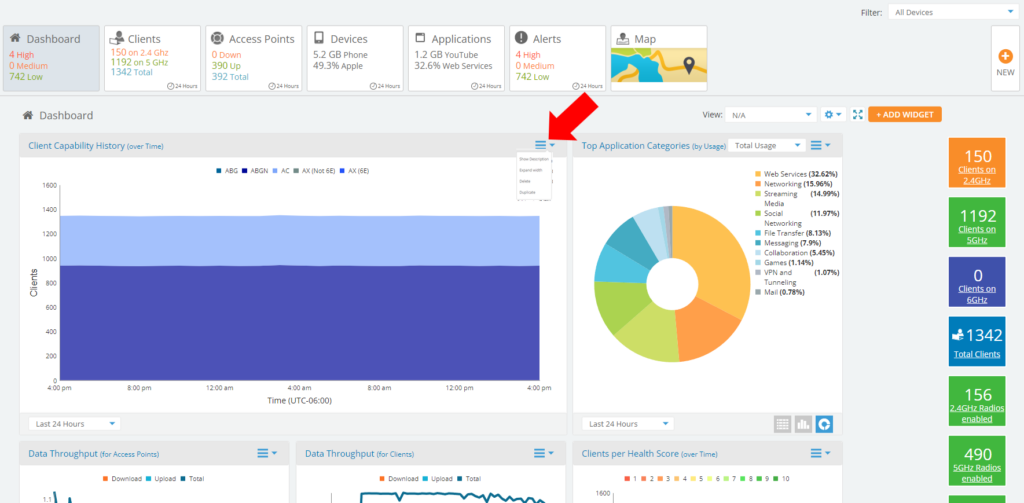
Expand width of widgets on Dashboard
To get a better view of the data on a Dashboard widget, you can expand the width of the widget so that it will take the space of two widgets. When you are finished viewing the widget in expanded mode, you can reduce the width of the widget back to it’s original size. To expand a widget, click the drop-down menu in the upper right corner of the widget and select Expand width.